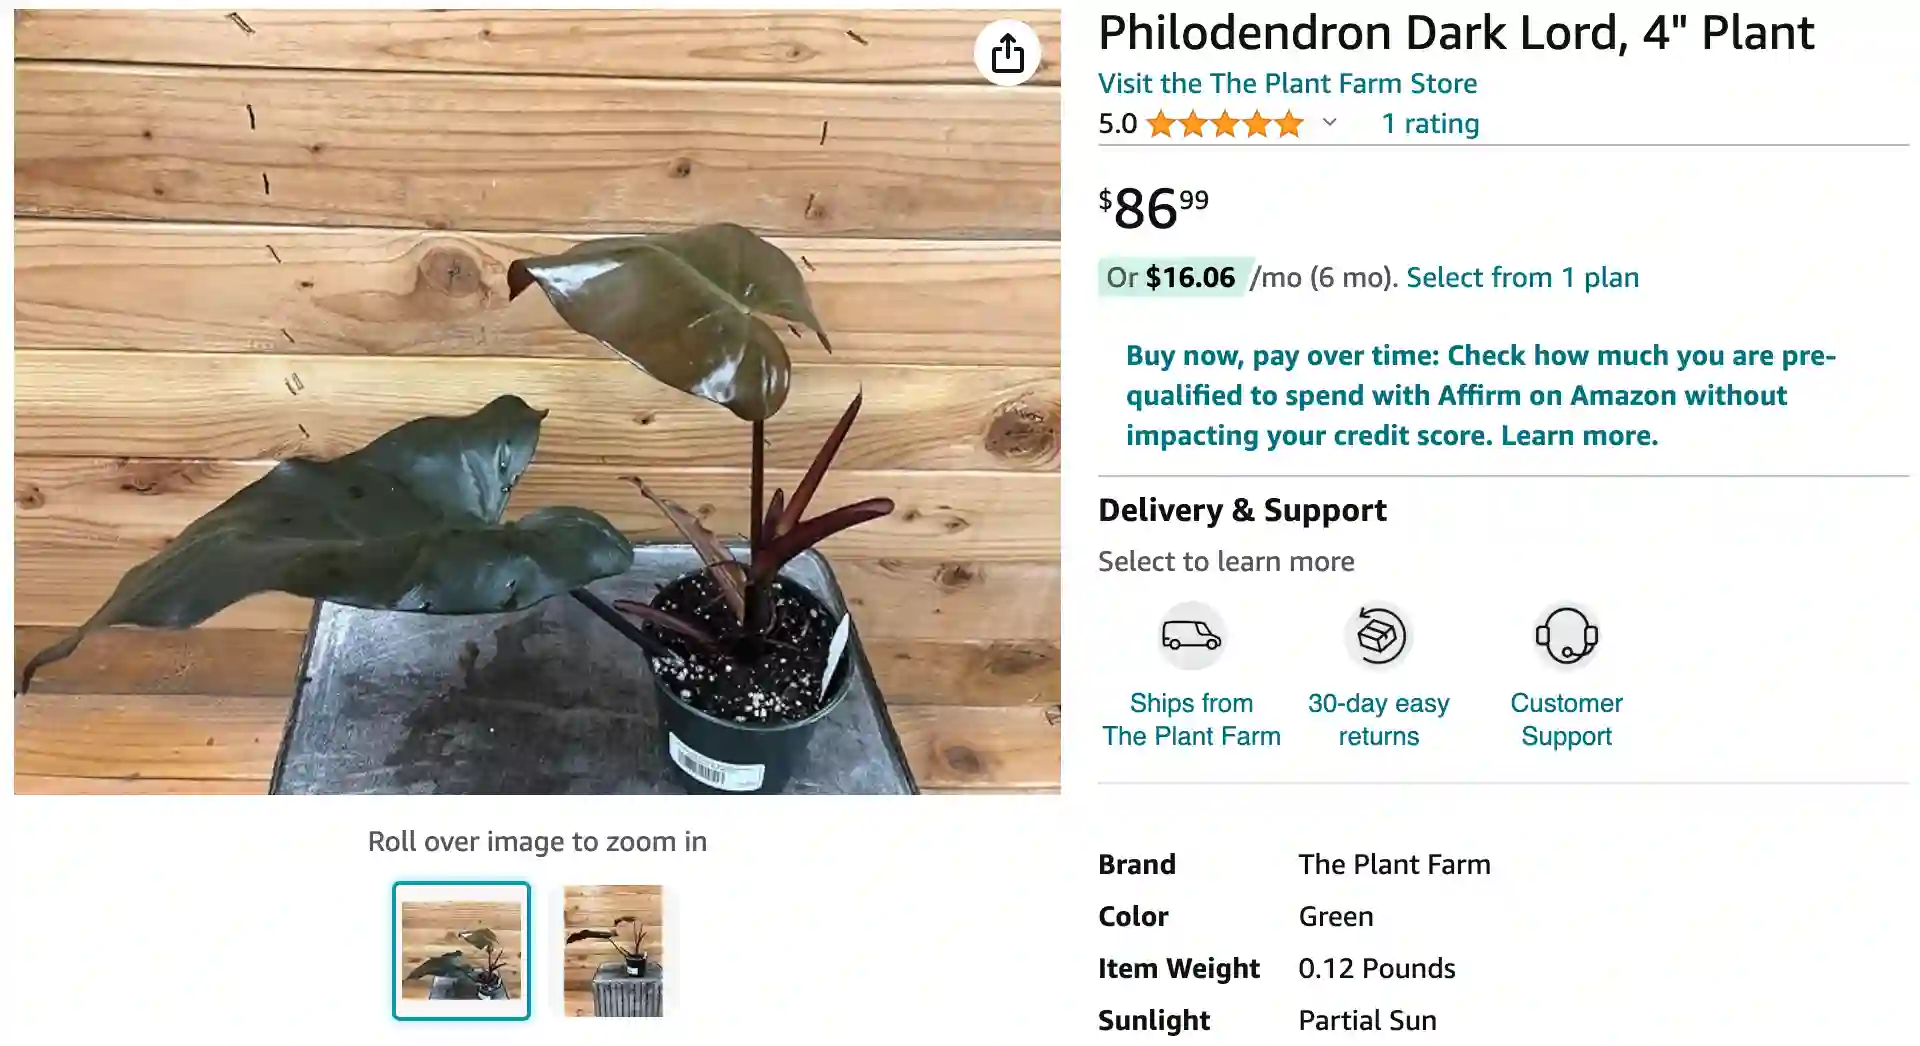
1. Introduction to Philodendron Dark Lord: The Enigmatic Beauty
1.1. What is Philodendron ‘Dark Lord’?
The Philodendron ‘Dark Lord’ is a stunning and widely popular hybrid cultivar within the Philodendron genus. It is particularly distinguished by its spectacular and dynamic coloration: new leaves unfurl in striking shades of reddish-bronze, deep burgundy, or even a dark, almost black hue. As these leaves mature, they transition to a rich, glossy deep green, often retaining a subtle metallic sheen and hints of their dark origins, creating a continuous display of evolving color. This dramatic chromatic display, combined with its large, deeply lobed leaves and vigorous climbing habit, makes it a true collector’s dream and a bold focal point in any indoor plant collection.
1.2. Reasons for its Appeal
Philodendron ‘Dark Lord’ captivates plant enthusiasts for several compelling reasons:
- Dramatic Coloration: Its dark, evolving reddish-bronze to nearly black new growth is incredibly striking and unique, offering a gothic or sophisticated aesthetic.
- Large, Impressive Foliage: Its substantial, glossy, and often deeply lobed leaves create a strong visual impact.
- Dynamic Visual Interest: The constant color transformation as new leaves emerge and mature provides an engaging and dynamic visual experience.
- Collector’s Item: Its distinctive appearance and imposing size contribute to its high desirability among plant collectors.
2. Origins and Distinguishing Characteristics
2.1. Origins
The Philodendron ‘Dark Lord’ is a cultivated hybrid, specifically bred for its unique dark coloration and robust growth. As a hybrid, it does not have a specific wild origin like a species. Its genetic lineage traces back to various Philodendron species native to the tropical rainforests of Central and South America. Its development is a testament to horticultural efforts to create visually stunning and stable cultivars for indoor cultivation.
2.2. Leaf Morphology and Color Progression
The leaves of Philodendron ‘Dark Lord’ are typically large, arrow-shaped with distinct basal lobes, or somewhat elongated, and possess a thick, leathery, and very glossy texture. The most defining characteristic is its color progression:
- New Growth: Emerges in striking shades of reddish-bronze, deep burgundy, or almost black. These dark tones are often very intense.
- Mature Growth: Gradually transitions to a rich, glossy deep green as the leaves fully expand and harden off. The dark coloration may subtly linger, especially on the undersides or in certain lighting conditions, contributing to its “dark” appearance. The leaves are generally entire (not deeply fenestrated like some Monsteras), but their prominent shape and size contribute to its imposing presence.
2.3. Growth Habit and Rate
Philodendron ‘Dark Lord’ is a climbing Aroid. It produces strong aerial roots that readily cling to surfaces, allowing it to ascend moss poles, trellises, or other structures. Providing vertical support is highly recommended as it encourages the plant to produce larger, more mature leaves and promotes its natural upright growth habit. Without support, it tends to sprawl or trail. Its growth rate is generally moderate under optimal conditions, making it a rewarding plant for those who enjoy seeing noticeable progress.
2.4. Toxicity
Like most other Philodendron species, Philodendron ‘Dark Lord’ is considered toxic to pets (cats, dogs) and humans if ingested. It contains calcium oxalate crystals, which can cause irritation and swelling of the mouth, throat, and digestive tract, leading to discomfort, vomiting, and difficulty swallowing. It is advisable to keep this plant out of reach of pets and small children.
2.5. Comparison to Similar Philodendrons (Black Cardinal, Imperial Red, Red Emerald)
Philodendron ‘Dark Lord’ is a dramatic choice, but it’s often compared to other Philodendrons with dark or reddish new growth, particularly large-leafed types.
- Philodendron ‘Dark Lord’: Characterized by large, arrow-shaped, glossy leaves that unfurl in reddish-bronze to almost black hues, maturing to deep green. It is a climbing Philodendron.
- Philodendron erubescens ‘Black Cardinal’: Has new leaves that emerge a very dark red, almost black, and mature to a deep, dark green. However, ‘Black Cardinal’ is primarily a self-heading (non-vining) Philodendron, forming an upright bush without needing a moss pole, unlike ‘Dark Lord’. Its leaves are typically broader and more rounded.
- Philodendron ‘Imperial Red’: Features new leaves in vibrant red tones, maturing to deep green. It is also a self-heading Philodendron and its leaves are generally broader and less elongated than ‘Dark Lord’.
- Philodendron erubescens ‘Red Emerald’: While it also has reddish new growth and stems, ‘Red Emerald’ typically has leaves that unfurl a vibrant reddish-burgundy and mature to glossy green, often retaining red stems. The new growth of ‘Red Emerald’ is generally not as intensely dark as ‘Dark Lord’. It is also a climbing Philodendron.
The primary distinguishing features of ‘Dark Lord’ are its combination of climbing habit, substantial, glossy, arrow-shaped leaves, and the intensely dark, almost black new growth that gradually deepens to a rich green.
3. Comprehensive Care Guide: Nurturing Your Dark Lord
Cultivating a thriving Philodendron ‘Dark Lord’ demands meticulous care to highlight its dramatic foliage coloration and overall health, mimicking its tropical ancestry.
Table 1: Quick Care Guide for Philodendron Dark Lord
| Care Factor | Requirement Description |
|---|---|
| Light | Bright, indirect light (e.g., East/North window, filtered South/West). Crucial for color. Avoid direct harsh sun. |
| Temperature | Ideal range: 18-27°C (65-80°F). Protect from cold drafts. |
| Humidity | Moderate to high (50% or above) is preferred. Appreciates higher moisture. |
| Watering | Water when top 1 inch of soil is dry. Allow partial drying. Ensure good drainage. Avoid overwatering. |
| Soil | Well-draining, airy, rich, organic mix (aroid mix, or potting soil + perlite + orchid bark). |
| Fertilization | Balanced liquid fertilizer, diluted sparingly (monthly or bi-monthly) in spring/summer. Withhold in fall/winter. |
| Pruning | Remove old/damaged leaves, prune to control size/remove leggy growth. |
| Repotting | Every 2-3 years, or when root-bound, in spring. Increase pot size slightly. |
| Support | Provide a moss pole or trellis for climbing. |
3.1. Light Requirements
Bright, indirect light is ideal for Philodendron ‘Dark Lord’. This is crucial for it to develop and maintain its intense dark coloration in new growth. Place your plant near an east or north-facing window for ample indirect light. For south or west-facing windows, use a sheer curtain to diffuse intense light or place the plant a few feet away from the window. Direct, harsh sunlight can easily scorch its glossy leaves, leading to irreversible brown spots and dulling its dramatic dark colors. Conversely, insufficient light can lead to slower growth, smaller leaves, leggy stems, and a less intense or faded dark color, with new leaves appearing predominantly green rather than dark.
3.2. Temperature and Humidity
As a plant from warm, humid climates, Philodendron ‘Dark Lord’ prefers consistently warm temperatures, ideally ranging from 18-27°C (65-80°F). It’s crucial to protect it from cold drafts and sudden temperature fluctuations, as temperatures below 18°C (65°F) can stress the plant, slow growth, and cause leaf damage. Avoid placing the plant near open doors, air conditioning vents, or heating units.
Moderate to high humidity (50% or above) is highly preferred by Philodendron ‘Dark Lord’. While it can tolerate average household humidity, optimal growth and pristine leaf appearance (especially the development of its dark hues) are achieved with higher moisture levels. Signs of insufficient humidity might include crispy brown leaf edges or tips. You can increase humidity by using a room humidifier, placing the pot on a pebble tray filled with water (ensuring the pot itself doesn’t sit in the water), or grouping the plant with other humidity-loving plants to create a humid microclimate. Regular misting can also provide a temporary boost.
3.3. Watering Practices
Proper watering is critical for Philodendron ‘Dark Lord’. It prefers its soil to dry out partially between waterings to prevent root rot. Water thoroughly when the top 1 inch (2.5 cm) or so of the soil feels dry to the touch. Ensure that the pot has excellent drainage holes and that any excess water drains out completely from the bottom. Never allow the plant to sit in standing water, as this is the primary cause of root rot. Overwatering is a common mistake, and philodendrons are often more tolerant of slight underwatering than overwatering.
The frequency of watering will depend on environmental factors like light, temperature, and humidity, as well as the pot size and soil mix. Expect to water more often during the warmer, active growing months (spring and summer), typically about once a week. During the cooler, dormant months of fall and winter, reduce watering frequency significantly, allowing the soil to dry out more thoroughly between waterings. Drooping leaves can indicate both underwatering and overwatering (due to root damage).
3.4. Optimal Soil Mix and Repotting
A well-draining, airy, and nutrient-rich potting mix is essential for Philodendron ‘Dark Lord’. This mimics the loose, organic matter it would find in its native climbing environment. An ideal mix should promote good aeration while retaining sufficient moisture. A suitable blend, often referred to as an “aroid mix,” can include:
- High-quality indoor potting soil (approximately 50%)
- Perlite or pumice (approximately 20-30%) for excellent drainage and aeration
- Orchid bark (approximately 20-30%) for chunkiness and improved air circulation
Repotting: Repot your Philodendron ‘Dark Lord’ typically every 2-3 years, or when you notice it has become root-bound (roots growing out of drainage holes, water running straight through the pot too quickly, stunted growth). Spring is the best time to repot, as the plant is entering its active growth phase. Choose a new pot that is only slightly larger than the previous one (e.g., 1-2 inches larger in diameter), ensuring it has ample drainage.
3.5. Fertilization Strategies
During its active growing season (spring and summer), fertilize your Philodendron ‘Dark Lord’ monthly or every other month with a balanced liquid fertilizer, diluted to half the recommended strength. This provides the necessary nutrients to support vigorous growth and maintain its vibrant coloration. Reduce or completely stop fertilizing during the fall and winter months when the plant’s growth naturally slows. Avoid overfertilizing, as it can lead to salt buildup in the soil, which can burn the roots and cause leaf damage (e.g., crispy brown tips). Always water the plant thoroughly before applying fertilizer to protect the roots.
3.6. Pruning and Maintenance
Regular pruning is beneficial for Philodendron ‘Dark Lord’ to maintain its desired shape and remove any unhealthy foliage. You can prune to control size or remove leggy growth during the growing season. Remove any yellowing, browning, or dead leaves to maintain its appearance and health using clean, sharp, sterile pruners. You can propagate the trimmings. Regularly wipe the leaves with a damp cloth to remove dust, which improves the plant’s ability to photosynthesize and keeps the foliage looking vibrant. Providing a moss pole or trellis for support is recommended, as this climbing plant benefits from vertical growth, leading to larger and more robust leaves.
4. Propagation Techniques: Expanding Your Collection
Propagating Philodendron ‘Dark Lord’ is a straightforward way to create new plants. The most common and effective method is using stem cuttings. The best time for propagation is during the spring or early summer when the plant is actively growing.
4.1. Stem Cuttings
- Select a Healthy Stem: Choose a healthy, mature stem section that has at least one node (the bump on the stem where a leaf or aerial root emerges) and preferably one or two healthy leaves. Select a section that exhibits good dark coloration if you wish to replicate that trait.
- Sterilize Tools: Always use clean, sharp, and sterilized pruning shears or a knife to make your cuts. This prevents the spread of diseases.
- Make the Cut: Cut the stem just below a node. Remove any lower leaves that would be submerged in your chosen rooting medium to prevent rot.
- Rooting Hormone (Optional): Applying a rooting hormone (powder or gel) to the cut end can stimulate faster and more robust root development.
- Rooting Medium Options:
- Water Propagation: Place the cutting in a clear jar with fresh water, ensuring the node is fully submerged. Change the water every few days to keep it clean and prevent bacterial growth. Roots typically begin to form within a few weeks.
- Sphagnum Moss: Plant the cutting in moist, but not soggy, sphagnum moss. This medium provides excellent aeration and moisture retention, often leading to robust root development.
- Soil: You can also plant the cutting directly into a small pot filled with a well-draining, airy potting mix suitable for aroids. Keep the soil consistently moist but not soggy.
- Provide Optimal Environment: Place your cuttings in a warm location that receives bright, indirect light. High humidity (e.g., within a propagation box or covered with a clear plastic bag to create a mini-greenhouse effect) will significantly accelerate the rooting process.
- Potting Up: Once the roots are a few inches long (for water or moss propagation), or significant new leaf growth is visible (for soil propagation), your new plant is ready to be transitioned to a larger pot with its permanent potting mix.
5. Troubleshooting Common Issues: Pests, Diseases, and Environmental Stress
While generally robust, Philodendron ‘Dark Lord’ can encounter a few common problems if its specific care requirements are not met. Prompt identification and action are crucial for maintaining its health.
Table 2: Common Problems & Troubleshooting for Philodendron Dark Lord
| Problem | Symptoms | Solutions/Treatment |
|---|---|---|
| Yellowing Leaves | Older, lower leaves turning yellow. | Overwatering (most common), insufficient light, nutrient deficiency, natural aging. Adjust watering, fertilize, check roots for rot. |
| Brown Crispy Edges/Tips | Leaves browning and feeling crispy at edges. | Low humidity, underwatering, direct sun exposure. Increase humidity, adjust watering, move to indirect light. |
| Drooping Leaves | Leaves losing turgor, looking limp. | Underwatering (most common), severe overwatering (root rot), cold shock. Check soil moisture, inspect roots, ensure warmth. |
| Fading Dark Coloration | New leaves lack intense dark hue, mature leaves are less glossy/dark. | Insufficient bright indirect light. Move to brighter spot. |
| Leggy Growth | Long stems with sparse leaves. | Insufficient light. Move to brighter location. Prune to encourage bushier growth. |
| Pest Infestations | Visible pests (mealybugs, spider mites, thrips, scale), sticky residue, distorted growth. | Isolate plant, treat with insecticidal soap, neem oil, or appropriate pesticides. |
| Root Rot | Mushy stem base, black/brown, foul-smelling roots, yellowing/wilting. | Overwatering, poor drainage. Repot, trim rotten roots, improve drainage, reduce watering. |
| Fungal Leaf Spot | Various spots on leaves. | Improve air circulation, reduce humidity if too high, remove affected leaves. Fungicides if severe. |
5.1. Watering Issues
- Overwatering: This is the most common cause of problems. Symptoms include yellowing leaves (particularly older, lower ones), black/brown spots on leaves, a mushy stem near the soil line, and a foul, moldy smell from the soil. This eventually leads to root rot.
- Solution: Allow the top 1 inch (2.5 cm) of soil to dry out completely between waterings. Ensure the pot has excellent drainage. If root rot is suspected, unpot the plant, trim any rotted, mushy roots, and repot in fresh, well-draining soil. Reduce watering frequency, as philodendrons are often more tolerant of slight underwatering.
- Underwatering: Symptoms include drooping or curled leaves, crispy brown edges or tips, and overall dull foliage. The plant may visibly droop when thirsty.
- Solution: Increase watering frequency. Ensure you are watering thoroughly so that water drains from the bottom of the pot, indicating the entire root ball has been moistened.
5.2. Light Issues
- Insufficient Light: Can lead to slower growth, smaller leaves, leggy stems (long gaps between leaves on the stem as it stretches for light), and a significant fading of the intense dark coloration, with new leaves appearing less dark.
- Solution: Move the plant to a location that receives bright, indirect light. Consider supplementing with a grow light if natural light levels are consistently low.
- Too Much Direct Light: Harsh direct sun, especially during midday, can cause leaf scorch. Symptoms include brown, crispy patches or a faded appearance on the leaves.
- Solution: Relocate the plant to a spot with filtered light, or use sheer curtains to diffuse intense sunlight.
5.3. Humidity and Temperature Stress
- Low Humidity: Often causes the leaf edges or tips to turn brown and crispy. New leaves might struggle to unfurl properly and could become distorted.
- Solution: Increase ambient humidity using a humidifier, pebble tray, or by grouping plants together.
- Cold Stress: Exposure to temperatures below 18°C (65°F) can severely stress the plant, leading to leaf damage, wilting, and overall decline.
- Solution: Ensure the plant is in a consistently warm environment (18-27°C is ideal) and protected from cold drafts from windows or air vents.
5.4. Pests
Common houseplant pests like mealybugs, spider mites, thrips, and scale can occasionally infest Philodendron ‘Dark Lord’.
- Symptoms: Visible insects (mealybugs with white, cottony masses; spider mites with fine webbing; thrips with silver streaks and black frass; scale with hard, immobile bumps), sticky residue (honeydew), or speckled, distorted leaves.
- Solution: Regularly inspect your plant, especially the undersides of leaves and stem crevices. Isolate infested plants immediately. Treat with appropriate organic pest control methods such as insecticidal soap, neem oil, or by wiping pests off with an alcohol-dipped cotton swab. Increasing humidity can help deter spider mites.
5.5. Diseases
- Root Rot: This is a serious fungal disease, almost always a result of overwatering and poorly draining soil.
- Symptoms: Yellowing, wilting leaves (even when the soil is wet), a mushy stem near the soil line, and black/brown, foul-smelling roots.
- Solution: Immediately remove the plant from its pot. Carefully inspect the roots and prune away all affected (mushy, black) sections with sterilized shears. Repot the plant in fresh, well-draining aroid mix, and adjust your watering schedule to allow the soil to dry adequately between waterings.
- Fungal Leaf Spot: Can appear as various spots on the leaves.
- Solution: Improve air circulation around the plant, reduce overly high humidity, and remove affected leaves. Fungicides may be used in severe cases.
6. Conclusion: Enjoying Your Thriving Philodendron Dark Lord
Philodendron ‘Dark Lord’, with its dramatic dark new growth and imposing climbing form, is a truly captivating and rewarding plant to cultivate. By consistently providing it with bright, indirect light, appropriate watering, moderate to high humidity, stable warm temperatures, and a well-draining, airy soil mix along with adequate climbing support, you can ensure your ‘Dark Lord’ thrives. While it demands attention to its specific needs, the reward of nurturing its unique beauty and watching its bold, dark leaves unfold will bring immense satisfaction and a distinctive, regal flair to your indoor space.
If i die, water my plants!
