What are day lilies?
I, Ferb Vu, have always been drawn to the vibrant beauty of flowers. Their diverse forms and colors never cease to amaze me. Among my favorites is the Hemerocallis, commonly known as the daylily. These resilient and stunning plants have captivated me with their ephemeral blooms and their ability to thrive in diverse conditions.
A Fleeting Beauty
The name “daylily” perfectly captures the essence of these flowers. Each individual bloom lasts only for a single day, opening in the morning and withering by nightfall. But don’t let this short lifespan fool you. Each daylily plant produces a profusion of buds, ensuring a continuous display of color throughout its blooming season. It’s like a daily renewal, a reminder to appreciate the beauty of the present moment.
I remember the first time I encountered a daylily in full bloom. It was a vibrant orange variety, its petals unfurling like a ballerina’s skirt. The delicate stamens, tipped with golden pollen, seemed to beckon pollinators to their sweet nectar. I was mesmerized by its simple elegance and the way it seemed to glow in the sunlight.
A Diverse Genus
The genus Hemerocallis belongs to the family Asphodelaceae and is native to Eurasia. These plants are renowned for their hardiness and adaptability, thriving in a variety of climates and soil conditions. They are also incredibly diverse, with thousands of cultivars available in a breathtaking array of colors, shapes, and sizes.
- Hemerocallis fulva: This is one of the most common and recognizable species, known for its vibrant orange flowers and its tendency to naturalize in various habitats.
- Hemerocallis lilioasphodelus: This species boasts fragrant, lemon-yellow flowers that resemble lilies, hence its name.
- Hemerocallis citrina: This night-blooming variety features pale yellow flowers with a distinct fragrance that intensifies in the evening. Plant FAQs: Hemerocallis Citrina
- Hemerocallis minor: This dwarf species is characterized by its smaller stature and delicate, pale yellow flowers.
- Hemerocallis middendorffii: This early-blooming species displays golden-yellow flowers with a prominent midrib.
- Hemerocallis coreana Nakai
- Hemerocallis darrowiana S.Y.Hu
- Hemerocallis dumortieri C.Morren
- Hemerocallis × exilis Satake
- Hemerocallis × fallaxlittoralis Konta & S.Matsumoto
- Hemerocallis forrestii Diels
- Hemerocallis hakuunensis Nakai
- Hemerocallis major (Baker) M.Hotta
- Hemerocallis multiflora Stout
- Hemerocallis nana W.W.Sm. & Forrest
- Hemerocallis plicata Stapf
- Hemerocallis thunbergii Barr
- Hemerocallis yezoensis H.Hara
A Gardener’s Delight
Daylilies are a joy to cultivate. They require minimal care and are relatively pest-free. Their resilience makes them ideal for both novice and experienced gardeners. Whether planted in borders, mass plantings, or containers, they add a touch of elegance to any landscape.
I find immense satisfaction in nurturing my own daylily collection. I enjoy experimenting with different varieties, creating a tapestry of colors and textures in my garden. Each spring, I eagerly await the emergence of their green shoots, a promise of the beauty to come.
What color are day lilies?
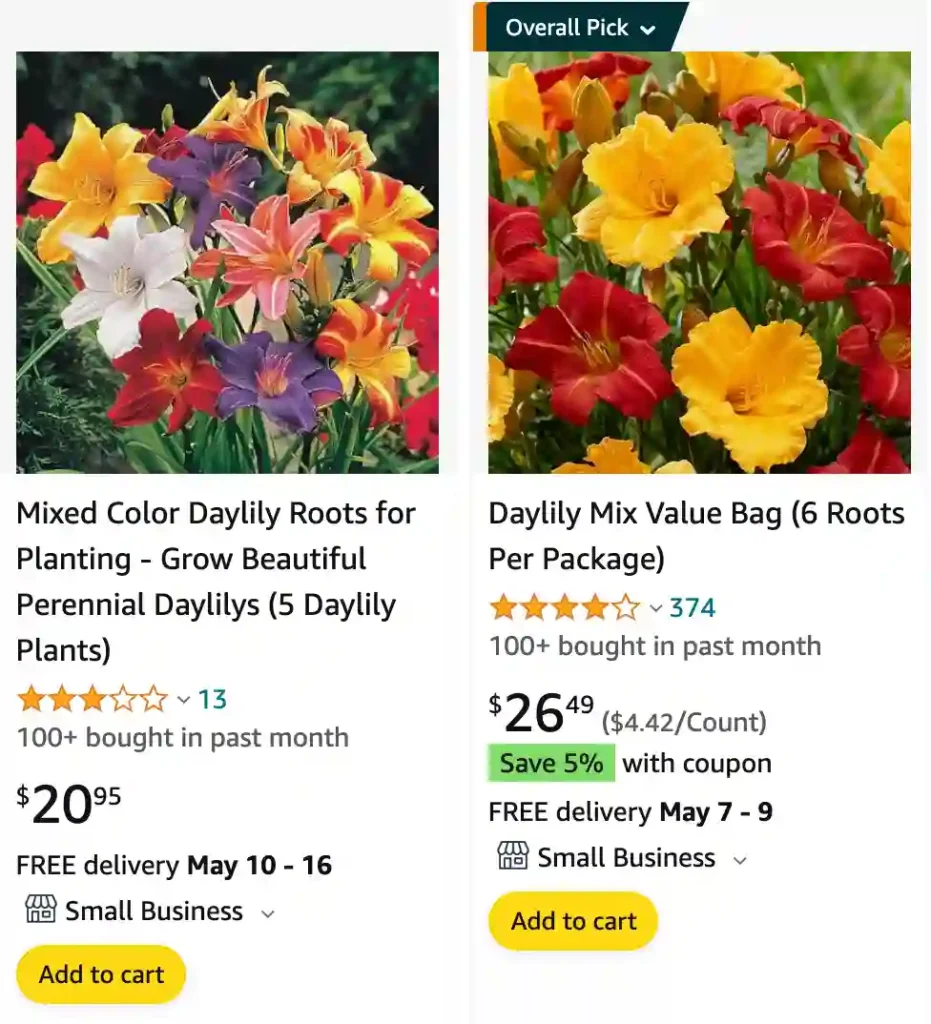
As I said, daylilies come in a surprising range of colors! You might see them in sunshine yellow, like the ones that grow wild by the old creek near my house, or a bright tangerine orange that makes you think of a juicy sunset. But it’s not all yellows and oranges. I’ve seen some incredible pink daylilies in my neighbor’s garden, soft as cotton candy, and even a few deep purple ones that look almost regal. They’re like living kaleidoscopes!
Are day lilies toxic to dogs?
This is where things get interesting. Even though they’re called lilies, daylilies are actually safe for dogs! Unlike true lilies, which can make my furry friends quite sick, daylilies don’t seem to bother them a bit. Sometimes I catch my pup, Luna, nibbling on the leaves or chasing after the petals that fall off, and I never have to worry. That’s a big relief for a dog owner like me!
Are day lilies toxic to cats?
Oh boy, here’s the flip side! Those same daylilies that are harmless to Luna? They can be downright dangerous for cats. Everything about the plant, from the leaves and stems right down to the pollen, is toxic to felines. And I mean toxic in a big way. Even a nibble or a lick can cause serious kidney problems. It’s scary stuff! That’s why I keep my daylilies well out of reach of my sneaky little feline friend, Mittens. He might think they look like fun to bat around, but I know better. Can’t be too careful when it comes to your furry companions!
When to plant day lilies?
You actually have two great windows to plant daylilies, depending on what works best for your schedule and climate. In the spring, I like to get them in the ground after all danger of frost has passed. That way, the roots have a chance to establish themselves before the summer heat hits. This works well for me here, but I’ve heard folks in warmer climates say that fall is the prime time. They say planting them 4-6 weeks before the first frost allows the roots to grow strong throughout the cool fall and winter months, making them ready to bloom come springtime. No matter which season you choose, just make sure to give them plenty of sunshine and well-drained soil, and they’ll reward you with their beautiful blooms for years to come!
Are day lilies deer resistant?
Ugh, deer and daylilies. It’s a complicated relationship. I wouldn’t exactly call daylilies deer resistant. In fact, sometimes I think they’re on the top of a deer’s favorite snack list! Those hungry hooved visitors have munched on more than a few of my daylily buds before I could enjoy the blooms myself. Especially those young, tender shoots in the spring? Deer candy as far as they’re concerned.
The good news is that daylilies are pretty tough plants. Even if the deer have a field day, the plant itself will usually survive. It might not bloom that year, but it’ll come back stronger next season. There are also some things you can do to deter the deer, like spraying repellent or planting less desirable deer food nearby. But honestly, sometimes you just gotta accept that daylilies and deer can coexist in your garden, even if it means sharing the beauty (or the lack thereof) sometimes.
Are day lilies edible?
Believe it or not, daylilies are not just beautiful additions to the garden, they’re also edible! I know, right? It always surprises people. You can actually eat most parts of the daylily plant. In the spring, I love picking the young shoots and adding them to stir-fries or salads. They have a mild flavor, kind of like asparagus. The flower buds are another tasty treat. I like to pickle them or batter and fry them for a unique appetizer. Even the petals are edible! They don’t have much flavor on their own, but they add a pretty pop of color to dishes. Of course, I only eat daylilies from my own garden, and I make sure they haven’t been sprayed with anything. But yeah, who knew these beauties could be a delicious addition to the dinner table too!
When to transplant day lilies?
Ah, transplanting daylilies! These troopers are surprisingly flexible when it comes to moving them around the garden. My personal preference is to wait until after they’ve finished their main bloom time in the summer. That way, the plant isn’t putting its energy into flowers and can focus on settling into its new home. But honestly, I’ve had success transplanting them in spring before the new growth explodes too much, and even in fall as long as it’s not right before a frost. The key is to give them a good watering after transplanting, no matter the season, to help them beat transplant shock. They might not bloom the year you move them, but with a little care, they’ll be back to putting on a show in no time!
How to plant day lily?
Planting daylilies is a breeze, and I can do it with my eyes closed (well, almost!). Here’s my tried-and-true method:
First, pick a spot that gets at least 6 hours of sunlight a day. Daylilies like their sunshine! Dig a hole that’s about twice as wide and deep as the root system of your plant, whether it’s in a pot or bare-root. For potted daylilies, gently loosen the roots before placing the plant in the hole. If you’re planting bare-root, make a small mound of soil in the center of the hole and spread the roots out over it.
The key here is the crown, where the roots meet the base of the leaves. You want this to be just barely above the soil line, not buried deep. Fill the hole back in with soil, pat it down gently to firm it up, and give your new daylily a good, long drink of water.
After that, it’s pretty much smooth sailing. Keep the soil moist, especially during the first few weeks, and watch your new plant thrive! You can add a layer of mulch around the base of the plant to help retain moisture and keep weeds at bay. That’s it! With a little sunshine and water, your daylilies will be rewarding you with their beautiful blooms for years to come.
Why are day lilies bad?
Daylilies aren’t all sunshine and rainbows, despite my love for them. Here’s the not-so-great side:
- Deer buffet: As I mentioned before, deer adore daylilies. Those springtime shoots and tasty buds can be a real temptation for hungry hooved visitors. They can decimate a beautiful display before you even get a chance to enjoy it.
- Invasive growers: While they’re easy to care for in your own garden, some varieties of daylilies can be aggressive spreaders. Their roots travel far and wide, and they can crowd out other plants, especially in natural areas. This is why it’s important to choose native varieties if you live somewhere where daylilies can become a problem.
- Short-lived blooms: One flower per day? That’s the daylily motto. While the plant keeps putting out new buds throughout the summer, each individual bloom only lasts a single day. It can feel a bit fleeting compared to some other flowers that hold their blooms for weeks.
- Faded foliage: Let’s be honest, daylily leaves aren’t exactly the most exciting part of the plant. By mid-summer, the foliage can start to look a bit tired and ragged. Some people find this detracts from the overall look of the garden.
So, while I wouldn’t say daylilies are bad exactly, they do have some drawbacks. But hey, with their low maintenance needs, long blooming season, and wide variety of colors, the good definitely outweighs the bad for me!
Do day lilies multiply?
You bet daylilies multiply! In fact, they’re known for being enthusiastic spreaders. They have two main ways of multiplying:
- Sending up fans: Daylilies grow in clumps, with new fans of leaves sprouting from the edges of the main plant throughout the season. This natural process gradually enlarges the clump over time.
- Division: This is where you get to play horticulturist and help the multiplying process along. Every few years (usually 3-5), you can dig up and divide the daylily clump. Basically, you’re separating the overgrown clump into smaller sections, each with its own healthy roots and leaves. You can then replant these divisions in other areas of your garden, creating more beautiful daylily displays!
More Than Just a Pretty Face
Beyond their aesthetic appeal, daylilies have also played a role in human history. In some cultures, the flowers are edible and used in culinary dishes. They have also been employed in traditional medicine for their purported healing properties.
For me, daylilies represent resilience, renewal, and the ephemeral nature of beauty. They remind me to appreciate the simple joys in life and to find beauty in the everyday. Each bloom is a fleeting masterpiece, a testament to the wonders of nature.


