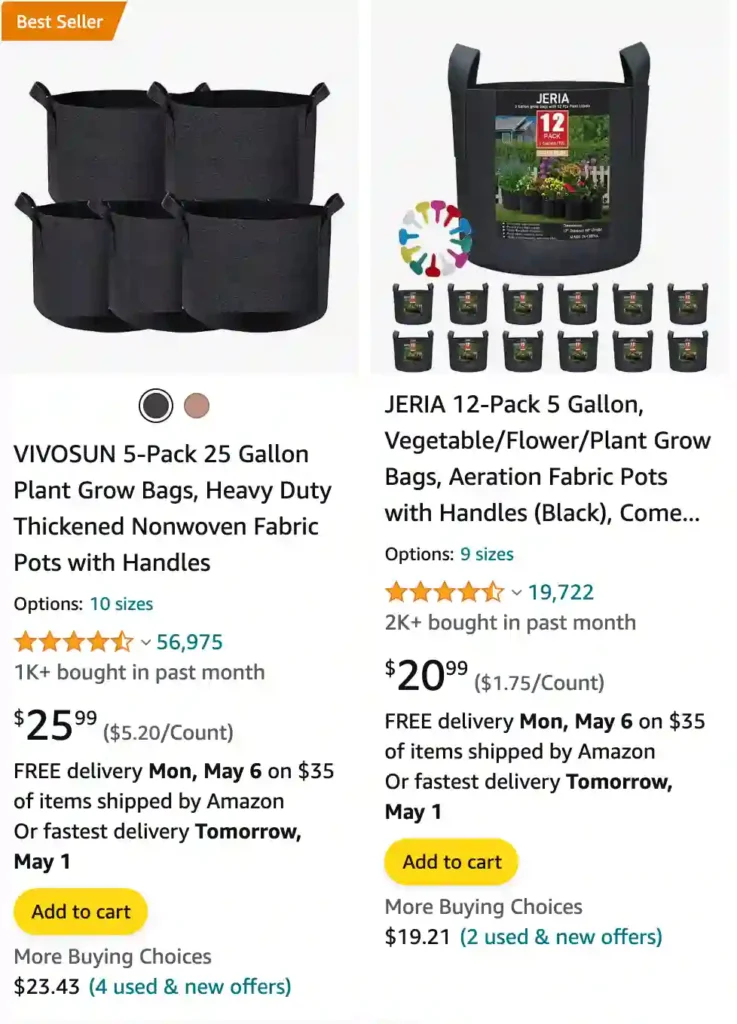
How to plant potatoes in a grow bag?
Last year, I decided to try growing potatoes in a grow bag on my balcony. It seemed easier than messing around in the dirt, and I figured it would be a fun way to see if I could actually harvest some spuds! The process itself was pretty straightforward. First, I found a good-sized grow bag, at least 20 gallons, and filled it about a third of the way up with a mix of potting soil and compost. Then, the fun part – picking out the seed potatoes! I went to a local garden center and got a variety pack, excited to see what colors I’d end up with. I pre-sprouted them a bit by placing them in egg cartons in a sunny spot, letting little shoots appear. Once they were ready, I gently placed them eye-side up on the soil in the bag, covered them with a few more inches of mix, and gave everything a good watering. The most surprising thing was how quickly the potato plants sprouted and grew. It was like a little jungle on my balcony!
How much soil for 20 gallon grow bag?
From my experience filling a 20-gallon grow bag last year for potatoes, you won’t need the entire bag filled with soil. You actually only need to fill it about ¾ of the way up. Here’s my reasoning:
- There’s always some settling of the soil after you fill the bag, so leaving some headroom prevents overflowing when you water.
- As the potato plants grow, you’ll gradually need to add more soil to cover the lower stems. This encourages them to sprout more potatoes underground!
- By not filling the bag completely, you also leave some space at the top for easy watering and reaching in to harvest your potatoes later.
So, for a 20-gallon bag, I’d estimate filling it with around 15 gallons of potting mix should be plenty to get you started. That way, you have room for the soil to settle, add more as needed for your plants, and comfortably manage your potato patch throughout the growing season.
How to grow mushrooms in a grow bag?
Growing mushrooms in a grow bag was surprisingly low-maintenance for me! It felt like a bit of science experiment magic happening right on my countertop. Here’s how it went down:
First, I went with a pre-made grow bag that already had the substrate (like the food for the mushrooms) inside. This saved me a step from having to pasteurize my own sawdust or straw. The bag also had a handy self-healing injection port. I ordered liquid culture online, because spores seemed a bit trickier for beginners. Following the instructions, I sterilized a needle with rubbing alcohol and injected the culture through the port – it felt a little intimidating, but the self-sealing part was cool!
Then came the waiting game. I placed the bag in a warm, dark corner of my closet – like a little mushroom maternity ward. Every few days, I’d check on it, and after a couple of weeks, I could see whitish threads spreading throughout the bag – that was the mycelium, the vegetative part of the mushroom!
The neatest part was fruiting time. Once the mycelium had colonized most of the bag, I followed the instructions to cut some ventilation holes near the top. I misted the bag lightly a couple of times a day to keep things humid, and then… mushrooms! Little white buttons started popping out within a week. It was fascinating to watch them grow bigger and bigger each day until they were ready to harvest. Fresh mushrooms straight from my closet – pretty darn cool!
How much potting soil for 10 gallon grow bag?
A 10-gallon grow bag won’t need a full 10 gallons of potting mix. Here’s what I’ve learned from filling grow bags myself:
- Soil settles: After filling, the soil will compact a bit. Leaving some space at the top prevents overflow when you water.
- Room for growth: Some plants, like tomatoes, benefit from burying their lower stems as they grow. This encourages root growth and can even produce extra little shoots or fruits!
- Watering and maintenance: Leaving some space at the top makes it easier to water your plants and reach in to harvest or care for them throughout the season.
For a 10-gallon grow bag, I’d estimate filling it with around 7-8 gallons of potting mix should be a good starting point. This gives the soil room to settle, leaves space for adding more as needed for specific plants, and allows for comfortable maintenance throughout the growing cycle.
When to mix all in one grow bag?
The key moment to mix my all-in-one grow bag came when the white, web-like mycelium had colonized most of the grain spawn layer at the bottom. It was like watching a slow-motion snowstorm spreading through the bag! Here’s why mixing is important:
- Faster growth: Once the mycelium has a good foothold in the grain spawn, mixing it with the uncolonized substrate creates more inoculation points. Imagine spreading out the white fighters! This speeds up colonization of the entire bag, meaning your mushrooms can fruit (grow the yummy caps we want) sooner.
- Even colonization: By mixing everything up, you distribute the established mycelium throughout the bag. This helps prevent patchy colonization and encourages the mycelium to consume all the substrate evenly, leading to a more consistent and productive grow.
There’s a sweet spot though. If you mix too early, before the grain spawn is well-colonized, it can slow things down. Waiting too long won’t necessarily harm anything, but missing that chance to accelerate growth feels like a missed opportunity to me. So, keeping an eye on that mycelium colonization is key to perfectly timing the mix for a thriving mushroom harvest!
How to harvest mushrooms from a grow bag?
Patience is key when harvesting mushrooms from a grow bag! You want to pick them at the right moment to get the best quality and encourage future flushes. Here’s what I’ve learned:
- Prime time: The perfect harvest window is when the veil, that thin membrane connecting the cap to the stem, just starts to tear. Once the veil breaks completely, the spores will start dropping. Spores can be messy and even inhibit new growth, so we want to catch them before that happens.
- Twist and pull: The gentlest way to harvest is to twist the mushroom base slowly at the substrate level. A light tug should then pop it free, leaving the minimal amount of stem behind. Brushing the area gently can remove any leftover bits. Using a knife risks damaging the delicate growing spot and invites contamination.
- Full harvest: Harvest all the mushrooms at this stage, even the smaller ones. This encourages the mycelium to focus its energy on producing new mushrooms for the next flush, giving you another round of delicious homegrown bounty!
How to fruit all in one grow bag?
Encouraging your all-in-one grow bag to fruit is like giving it a nudge to start producing the fun part – the mushrooms themselves! Here’s what worked for me based on my experience:
- Fresh air exchange: Once the mycelium has colonized most of the bag, it’s time to simulate the fresh air conditions mushrooms need to fruit. Following the instructions for your specific grow bag, carefully cut or puncture holes near the top. I used a sterilized needle for small holes, or a sanitized knife for larger ones. Don’t go overboard – too much air can dry things out.
- Light and humidity: Mushrooms typically don’t need direct sunlight, but some indirect light can help trigger fruiting. I found a spot with diffused natural light worked well. Humidity is crucial though! Mist the bag lightly with clean water a couple of times a day to keep things moist, mimicking the dewy conditions mushrooms love in nature.
- Patience: Be patient! It can take a week or two after introducing these changes for your first little mushrooms to pop out. But once they do, it’s a magical process to watch them grow bigger and bigger each day until they’re ready to harvest.
How many onions in a 10 gallon grow bag?
The number of onions you can plant in a 10-gallon grow bag depends on several factors, such as the variety of onion you choose and the size you want them to grow at harvest.
- Smaller onions: Shallots or green onions can be planted closer together, allowing for more plants per bag. You might be able to fit up to 8-10 onion plants in a 10-gallon bag.
- Larger onions: Sweet onions or Spanish onions need more space to develop properly. In a 10-gallon bag, you’d likely only want to plant 4-6 onion bulbs.
Here are some additional tips to keep in mind:
- Spacing: Check the recommended spacing for your chosen onion variety. This will give you a good idea of how far apart to plant your onions for optimal growth.
- Onion size: If you’re unsure about the variety, err on the side of fewer plants. You can always thin out the onions later if they start to crowd each other.
- Future growth: Remember, onions will keep growing throughout the season. Take into account their mature size when planting.
By considering these factors, you can determine the ideal number of onions to plant in your 10-gallon grow bag and maximize your harvest!
When to shake mushroom grow bag?
The best time to shake your mushroom grow bag, also known as breaking and shaking, is when the mycelium has colonized about 20-50% of the substrate. Here’s why shaking is beneficial and how to identify the right timing:
- Even distribution: Shaking breaks up the colonized mycelium and distributes it throughout the uncolonized substrate. This creates more inoculation points, essentially speeding up the colonization process and leading to a faster overall grow.
- Breaking up clumps: Sometimes mycelium can clump together in certain areas of the bag. Shaking helps break up these clumps, ensuring the entire substrate gets a chance to be colonized.
- The sweet spot: Shaking too early, when the mycelium hasn’t established itself well, can be stressful and slow things down. But waiting too long means missing the chance to accelerate growth.
Identifying the right time to shake:
- Visual inspection: Gently press on the bag or hold it up to light. If you see white webbing spreading through 20-50% of the substrate, that’s your cue to shake.
- Timeframe: This usually happens somewhere between 7-14 days after inoculation, depending on the mushroom variety and growing conditions.
Remember:
- Sterility: Wash your hands and work in a clean environment to minimize contamination risk during shaking.
- Gentle but firm: Break up the mycelium gently but firmly, ensuring everything gets mixed evenly.
- One shake is enough: You typically only need to shake the bag once during the growth process.
By shaking your grow bag at the right time, you’re setting your mushrooms up for a faster and more successful colonization, leading to a bountiful harvest!
Can i grow pumpkins in a grow bag?
You absolutely can grow pumpkins in a grow bag! It’s a great option for folks who don’t have a lot of garden space or want a more manageable way to cultivate these fun fall favorites. While pumpkins are known for their sprawling vines and big fruits, grow bags provide a surprisingly good alternative to traditional in-ground planting.
Here’s why grow bags work well for pumpkins:
- Size matters: Choose the right size bag. For pumpkins, you’ll want a grow bag that’s at least 20 gallons, but ideally even larger (30+ gallons) if you’re aiming for a big jack-o-lantern. The extra space allows the root system to develop and supports the weight of the growing pumpkin.
- Happy medium: Grow bags offer good drainage, which is important for pumpkins that don’t like soggy soil. They also provide some insulation for the roots, keeping them happy in fluctuating temperatures.
- Portable patch: The beauty of grow bags is their mobility. You can easily place them in a sunny spot on your patio, balcony, or even a rooftop garden, giving your pumpkins the best chance to soak up the sun.
Of course, there are some things to keep in mind:
- Support system: Vining pumpkin plants can get heavy, especially with a growing fruit. Consider staking your pumpkin vine or providing some kind of support structure to prevent it from toppling over.
- Watering woes: Grow bags can dry out faster than in-ground planting, so be mindful of watering needs, especially during hot summer days. Regular watering is key to keeping your pumpkin plant happy and hydrated.
- Variety selection: Not all pumpkin varieties are suited for grow bags. Opt for smaller pumpkins or bush varieties that take up less space and mature faster. Look for “Jack-Be-Little” or “Baby Boo” pumpkins for a successful grow bag adventure.
Overall, growing pumpkins in a grow bag is a fun and achievable way to enjoy these festive fall fruits. With the right size bag, some TLC, and maybe a little support structure, you can be on your way to harvesting your very own homegrown pumpkins!
Can i grow strawberries in a grow bag?
Absolutely! Grow bags are a fantastic option for growing strawberries, especially if you’re short on space or want a more manageable way to cultivate these delicious berries. Here’s why grow bags shine for strawberry plants:
- Happy roots: Strawberries prefer good drainage, and grow bags provide just that. The excess water drains away, preventing root rot, a common enemy of these shallow-rooted plants.
- Space savvy: Since strawberries are compact plants, a single grow bag can comfortably house several plants. This vertical growing method maximizes your harvest potential in a limited space, like a balcony or patio.
- Mobile munchies: The beauty of grow bags is their portability. You can easily move your strawberry patch around to chase the sun or find the perfect spot on your porch or deck.
Now, there are a few things to keep in mind for strawberry success in a grow bag:
- Bag size: Opt for a grow bag that’s at least 10 gallons, but preferably 15 gallons or more. This gives your strawberry plants enough room to grow and produce well.
- Filling frenzy: Use a good quality potting mix specifically formulated for fruits and vegetables. Strawberries prefer slightly acidic soil, so a mix with a pH around 6.0-6.8 is ideal.
- Feeding frenzy: Since grow bags have limited nutrient reserves, you’ll need to fertilize your strawberries regularly throughout the growing season. Opt for a water-soluble fertilizer specifically designed for fruiting plants.
- Watering wisdom: Grow bags tend to dry out faster than in-ground planting, so be mindful of watering needs. Regularly check the soil moisture and water deeply when the top inch or so feels dry.
By providing your strawberries with a well-draining grow bag, good quality potting mix, and consistent watering and feeding, you can look forward to a bountiful harvest of sweet, juicy berries right from your balcony or patio!
Can i grow sweet potatoes in a grow bag? How many sweet potato slips per 10 gallon grow bag?
You absolutely can grow sweet potatoes in a grow bag! It’s a great way to cultivate these tasty tubers even if you have limited space. Grow bags offer some advantages over traditional in-ground planting for sweet potatoes:
- Manageable container: Sweet potato vines can sprawl quite a bit. Confining them to a grow bag helps keep things under control and prevents them from taking over your garden.
- Root happy: Grow bags provide good drainage, which is essential for sweet potatoes that dislike soggy soil. This helps prevent problems like root rot.
- Portable patch: Just like with other vegetables, the beauty of grow bags is their mobility. You can easily place your sweet potato bag in a sunny spot on your patio or balcony, ensuring your plants get ample sun for optimal growth.
Here’s what to consider when growing sweet potatoes in a 10-gallon grow bag:
- Size matters: While a 10-gallon bag can work, for better results, especially if you want larger sweet potatoes, aim for a bag that’s at least 15 gallons or even bigger. The extra space allows the sweet potato roots to develop more freely.
- Slip selection: When planting sweet potatoes, you don’t use seeds, you use slips, which are basically little sprouts grown from mature sweet potatoes. For a 10-gallon grow bag, 2-3 sweet potato slips should be plenty.
Here’s a tip for the number of slips:
- More slips can mean more crowded vines and potentially smaller sweet potatoes. Spacing them out a bit allows for better growth and potentially larger yields.
Overall, growing sweet potatoes in a grow bag is a fun and rewarding way to enjoy these delicious vegetables. With the right size bag, proper drainage, and some sun-loving placement, you can be on your way to harvesting your very own homegrown sweet potatoes!
Can you grow broccoli in a grow bag?
Sure! I’ve experimented with growing broccoli in grow bags, and it’s been quite successful for me. The key is to ensure the bag is large enough to accommodate the broccoli plant’s root system and to provide ample sunlight and regular watering. I’ve found that broccoli thrives in grow bags, producing healthy and tasty heads.
Can you grow brussel sprouts in a grow bag?
Brussels sprouts are a bit trickier in grow bags, in my experience. While it’s possible to grow them, they require a bit more space and stability due to their tall and sturdy nature. I’ve had moderate success with Brussels sprouts in grow bags, but they do require careful attention to watering and fertilizing to ensure proper growth.
Can you grow cabbage in a grow bag?
Cabbage, on the other hand, has been a joy to grow in grow bags. They don’t require as much space as Brussels sprouts and adapt well to the confines of a grow bag. I’ve harvested some beautiful heads of cabbage from my grow bags, and they’ve been incredibly flavorful.
Can you grow corn in a grow bag?
Corn is a bit challenging to grow in grow bags due to its height and extensive root system. While it’s technically possible, I haven’t had much luck with corn in grow bags. They tend to become overcrowded and struggle to reach their full potential. I prefer to grow corn in traditional garden beds or larger containers.
Can you grow green beans in a grow bag?
Green beans, however, thrive in grow bags! They’re compact enough to grow comfortably in the limited space of a grow bag, and they produce a bountiful harvest. I’ve grown green beans in grow bags with great success, enjoying fresh beans throughout the season.
Can you grow lettuce in a grow bag?
Lettuce is one of the easiest vegetables to grow in grow bags. It’s compact, fast-growing, and doesn’t require much space or deep soil. I’ve grown several varieties of lettuce in grow bags, and they’ve all flourished, providing me with an abundance of fresh salad greens.
Can you grow peas in a grow bag?
Peas also do well in grow bags, especially smaller varieties like snap peas. They’re well-suited to the vertical space provided by grow bags, and I’ve had great success growing peas this way. With proper support and regular watering, they climb and produce delicious pods.
Can you grow rhubarb in a grow bag?
As for rhubarb, I haven’t personally tried growing it in grow bags. Rhubarb is a perennial plant with deep roots, so it may not be the best candidate for grow bags, which have limited space for root growth. I prefer to grow rhubarb in a permanent garden bed where it has room to spread out and thrive year after year.
What size grow bag for tomatoes? How many tomato plants in a 10 gallon grow bag?
A 10 gallon grow bag is a good size for tomatoes, but I would only recommend planting one tomato plant in it. I tried planting multiple tomato plants in a similar sized grow bag before and they ended up competing for space and nutrients. While they technically grew, they weren’t as bushy and fruitful as the ones I planted individually in 5-gallon bags. With just one plant in a 10-gallon bag, you’ll have more space for the roots to spread and for the plant to grow nice and big, giving you a better tomato harvest.
What size grow bag for peppers?
For peppers, I’ve found that a 5-gallon grow bag works well. It provides enough space for the pepper plant’s root system to develop and allows for ample growth and fruit production throughout the season.
What size grow bag for watermelon?
Watermelons require a bit more space, so I opt for larger grow bags around 10 gallons or more. This size allows the watermelon plant to spread out comfortably and supports the growth of larger fruits.
What size grow bag for cucumbers? How many cucumber plants per 10 gallon grow bag?
For cucumbers, a 10-gallon grow bag is a great size! In fact, it’s what I use for my own cucumber plants. They are vining plants that like to sprawl a bit, and the 10 gallons gives them enough room to grow happily without getting cramped. With a 10-gallon bag, I find I can comfortably fit one cucumber plant in there. If you squeeze two plants in, they might end up competing for resources and not produce as many cucumbers as they could. One healthy plant per bag has worked well for me, and I’ve gotten a good harvest throughout the season.
What size grow bag for zucchini?
Zucchinis are prolific growers, so I prefer to use grow bags that are at least 7 gallons in size. This gives the zucchini plants enough room to thrive and produce plenty of delicious squash throughout the season.
What size grow bag for squash?
Similarly, squash plants benefit from larger grow bags, typically around 7 to 10 gallons in size. This provides them with the space they need to spread out and produce abundant harvests of squash.
What size grow bag for carrots?
Carrots don’t require as much depth as some other vegetables, so a 5-gallon grow bag is usually sufficient for growing them. This size allows the carrots to develop long, straight roots without overcrowding.
What size grow bag for autoflowers?
Autoflowers, depending on the variety and desired yield, can be grown in smaller 3 to 5-gallon grow bags. These compact plants are well-suited to smaller containers and can thrive with proper care and attention.
What size grow bag for dahlias?
Dahlias, being larger flowering plants, require sizable grow bags, typically around 10 gallons or more. This provides them with the space they need to develop strong root systems and produce abundant blooms.
What size grow bag for garlic?
Garlic prefers deeper containers, so I typically use grow bags that are at least 5 gallons in size. This allows the garlic bulbs to develop fully without restrictions and ensures a bountiful harvest at the end of the season.
What size grow bag for herbs?
For herbs, smaller grow bags around 1 to 3 gallons in size work well. Herbs generally have shallow root systems and don’t require as much space as larger plants. This size of grow bag provides enough room for the herbs to grow comfortably while also allowing for easy placement on windowsills, balconies, or countertops, making it convenient for harvesting fresh herbs whenever needed.
What size grow bag for jalapenos?
Jalapenos are well-suited to smaller grow bags, typically around 3 to 5 gallons in size. This provides them with enough space to grow comfortably while still producing plenty of spicy peppers.
What size grow bag for kale?
Kale plants appreciate deeper containers for their extensive root systems, so I prefer grow bags that are at least 5 gallons in size. This allows the kale to grow vigorously and produce abundant leaves for harvesting.
What size grow bag for okra?
Okra plants benefit from larger grow bags, typically around 7 gallons or more. This size provides them with enough space to develop strong root systems and produce plenty of delicious okra pods throughout the season.
What size grow bag for raspberries?
Raspberries require larger containers to accommodate their spreading root systems, so I opt for grow bags that are at least 10 gallons in size. This allows the raspberry plants to spread out comfortably and produce ample fruit.
What size grow bag for spinach?
Spinach, being a compact plant, can be grown in smaller grow bags around 1 to 3 gallons in size. This provides enough space for the spinach to grow and produce plenty of nutritious leaves for harvesting.
If i die, water my plants!
