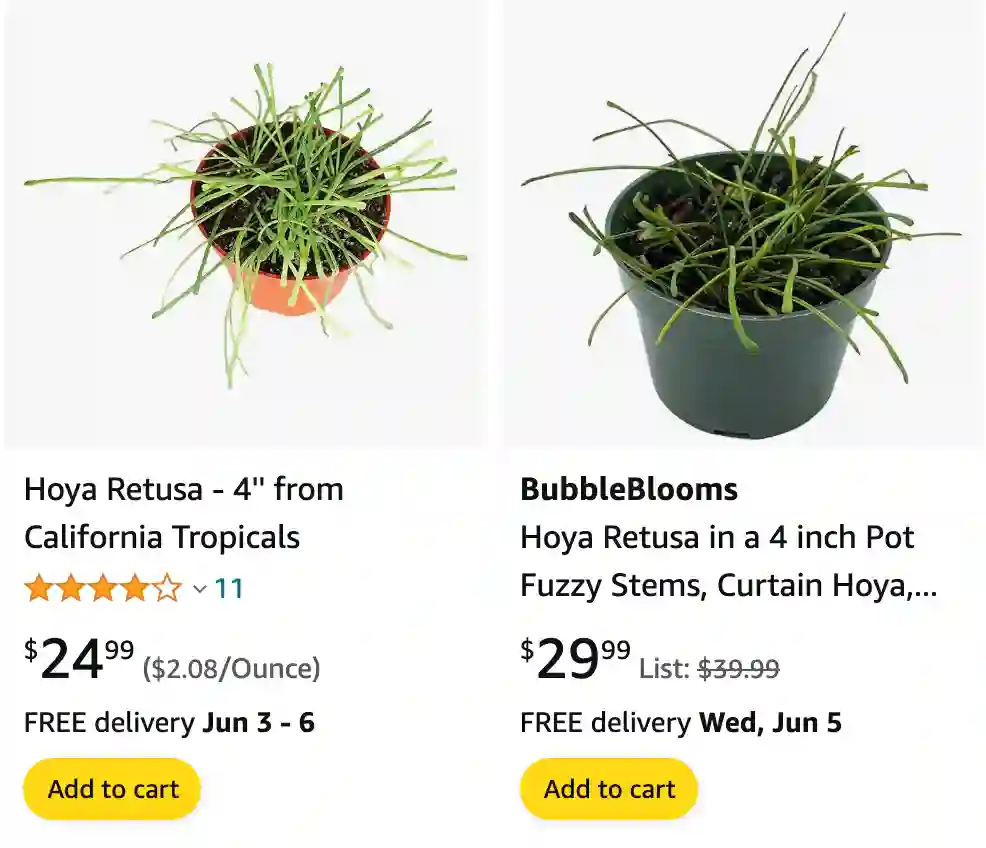
Hoya Retusa vs Hoya Linearis
When comparing my Hoya Retusa and Hoya Linearis, I notice how vastly different they are despite both being Hoyas. The Retusa’s flat, grass-like leaves give it a quirky, unique charm that always catches my eye. It feels like a conversation starter in my plant collection. On the other hand, the Linearis has these long, elegant, and soft leaves that cascade beautifully, almost like a green waterfall. I love the delicate, feathery texture it brings to my living room. Both plants are stunning, but in such different ways that they each add their own distinct flair to my space.
How to grow Hoya retusa?
The Hoya retusa, also known as the Krinkle Kwok Hoya, is a beautiful vining plant known for its unique crinkled leaves and fragrant blooms. Here’s a guide to help you grow your Hoya retusa successfully:
Light:
- Bright, indirect sunlight: This is ideal for promoting healthy growth and flowering. Avoid harsh direct sun, which can scorch the leaves.
- East or north-facing windows: These provide good lighting conditions. If your Hoya retusa lacks sufficient natural light, consider supplementing with grow lights.
Water:
- Water moderately: Allow the top inch of soil to dry out completely between waterings. Overwatering can lead to root rot.
- Signs of thirst: Look for wrinkled leaves or leaves that feel limp as signs your plant needs water.
Soil:
- Well-draining mix: This is crucial for preventing root rot. A good option is a commercial orchid mix or a mix of potting soil, perlite, and orchid bark.
Fertilizer:
- Light feeding: You can feed your Hoya retusa a balanced fertilizer diluted to half strength during the growing season (spring and summer). Apply it once a month or so. Avoid overfertilizing, as this can cause foliage growth at the expense of flowers.
Humidity:
- Moderate humidity is preferred: While Hoya retusa can tolerate average household humidity, it thrives in slightly higher humidity levels. You can increase humidity by using a pebble tray with water, a humidifier, or grouping plants together.
Temperature:
- Warm temperatures: Aim for temperatures between 60°F and 80°F (15-27°C). Avoid placing your plant near cold drafts or vents.
Support:
- Provide support: As your Hoya retusa grows, it naturally climbs. You can train it to climb a moss pole, trellis, or other support structure.
Pruning (optional):
- Minimal pruning required: Hoya retusa doesn’t require extensive pruning. You can trim leggy stems or remove dead leaves for aesthetic purposes. Prune during the growing season using sharp, sterile pruners.
Additional Tips:
- Repotting: Repot your Hoya retusa every 2-3 years or when the roots outgrow the current pot. Choose a pot with drainage holes that’s only slightly larger than the root ball.
- Blooming: With proper care, your Hoya retusa should produce clusters of fragrant flowers in the spring and summer.
- Pests and diseases: Hoya retusa is generally resistant to pests and diseases. However, watch out for mealybugs and scale, which can be treated with insecticidal soap or neem oil.
How to propagate Hoya retusa?
Propagating your Hoya retusa is a rewarding way to multiply your beautiful plant! Here are two effective methods you can use:
Method 1: Stem Cuttings
This is the most common and successful method for propagating Hoya retusa.
Materials:
- Sharp pruners or shears
- Well-draining potting mix suitable for Hoyas (consider adding perlite or orchid bark for extra drainage)
- Small pots (2-3 inches)
- Transparent container (optional, for creating a mini greenhouse)
- Rooting hormone (optional)
Steps:
- Select a healthy stem: Choose a healthy, mature stem with at least 2-3 nodes (the bump where a leaf meets the stem). Look for a stem that’s not too woody and might already have some aerial roots (fuzzy white bumps) – these indicate good potential for propagation.
- Make the cut: Using your sharp pruners, make a clean cut just below a node. You can also cut above a node if it has aerial roots. Aim for a cutting length of at least 4-6 inches.
- Optional: Remove bottom leaves: You can remove the bottom pair of leaves from the cutting to expose the node.
- Optional: Rooting hormone: If using rooting hormone, dip the cut end of the stem in the powder, tapping off any excess.
- Planting: Fill your pots with the well-draining potting mix. Make a small hole in the center with your finger and insert the node of the cutting, ensuring it’s in contact with the soil.
- Watering: Water the pot lightly to settle the soil around the cutting. Avoid overwatering.
- Placement: Here, you have two options:
- Open pot method: Place the pot in a location with bright, indirect sunlight. You can use a humidity tray (a tray with pebbles and water, keeping the pot bottom above the water level) to increase humidity around the cutting.
- Mini greenhouse method (optional): Place the pot inside a transparent container (like a plastic cloche or a clear container with ventilation holes) to create a mini greenhouse environment with high humidity.
- Rooting: It can take several weeks for roots to develop. Signs of successful rooting include new growth appearing at the top of the cutting. You might also see new roots emerging near the node in the soil.
- Transplanting: Once the roots are well-established (usually 4-6 weeks), you can remove the transparent container (if used) and harden off the new plant by gradually introducing it to lower humidity. Then, transplant it to a larger pot or your desired location in your home.
Method 2: Layering
This method involves encouraging root growth on a stem while it’s still attached to the mother plant.
Steps:
- Select a mature stem: Choose a healthy, long stem on your Hoya retusa.
- Lightly scratch the surface of the stem: Using a sharp knife or tool, gently scratch a small area (about an inch long) on the underside of the stem, near a node.
- Moist Sphagnum Moss: Apply moist sphagnum moss around the scratched area and secure it with plastic wrap or a twist tie.
- Maintain moisture: Keep the sphagnum moss consistently moist. You can mist it regularly or soak it and squeeze out excess water.
- Root development: After a few weeks, you should see roots developing through the sphagnum moss.
- Cutting and potting: Once the roots are well-established, you can cut the stem below the sphagnum moss and pot the rooted section in a well-draining potting mix like you would with a stem cutting.
Here are some additional tips for propagating Hoya retusa:
- Use sterile tools to prevent introducing diseases.
- Consider using a heat mat to promote faster root development (optional for both methods).
- Be patient! Propagation can take time, so don’t be discouraged if you don’t see results immediately.

