Comfrey: A Deep Dive with Ferb Vu
I’ve always been fascinated by the natural world, especially the plants that have been used for centuries for their medicinal and practical properties. One genus that particularly piques my interest is Symphytum, more commonly known as comfrey. This group of hardy perennials, belonging to Boraginaceae – the borage family, boasts a rich history and a wide array of uses. Let’s delve deeper into the world of comfrey, exploring its various species and unique characteristics.
A Brief History of Comfrey
Comfrey’s use dates back to ancient times, with evidence suggesting its application in traditional medicine for over 2,000 years. The very name “comfrey” originates from the Latin word “confervere,” meaning “to grow together,” alluding to its historical use in bone fracture treatment. This association stems from the plant’s high allantoin content, a compound known to promote cell growth and regeneration.
What do comfrey plants look like?
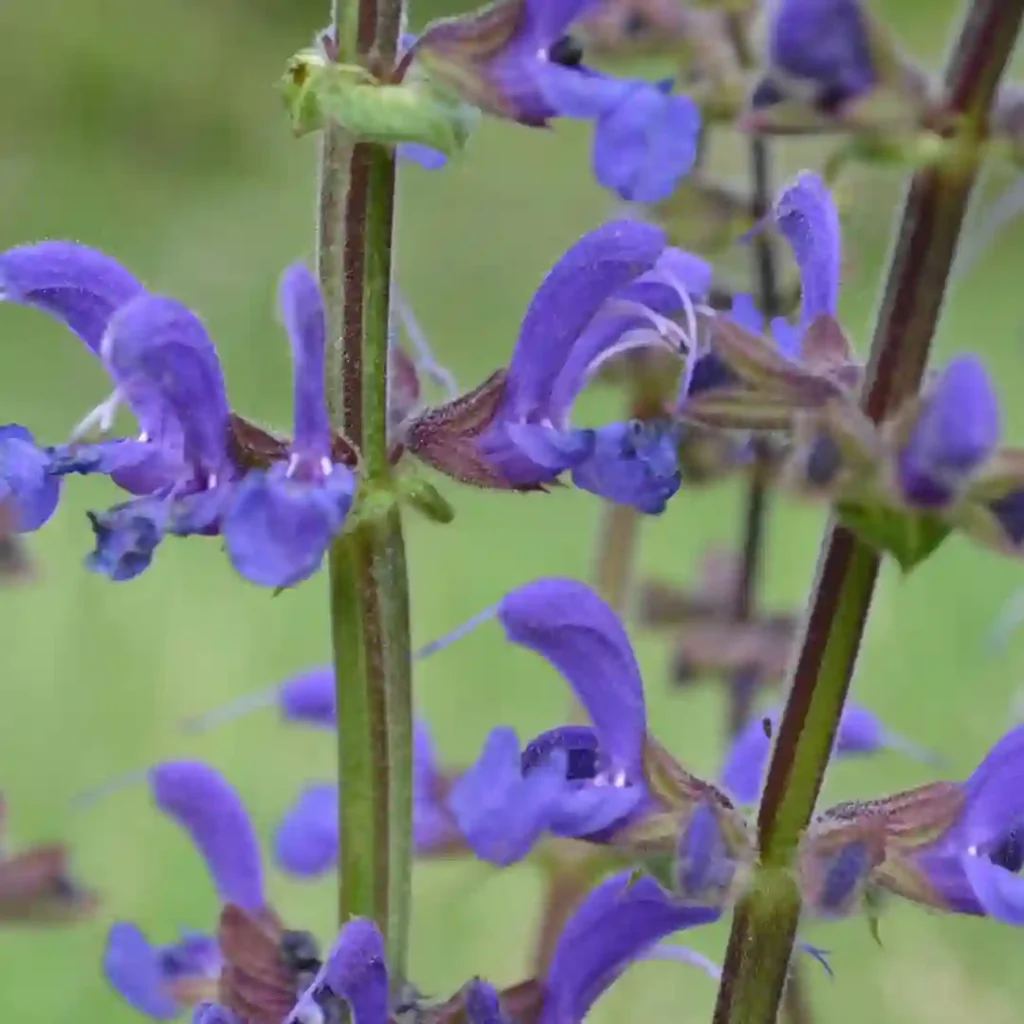
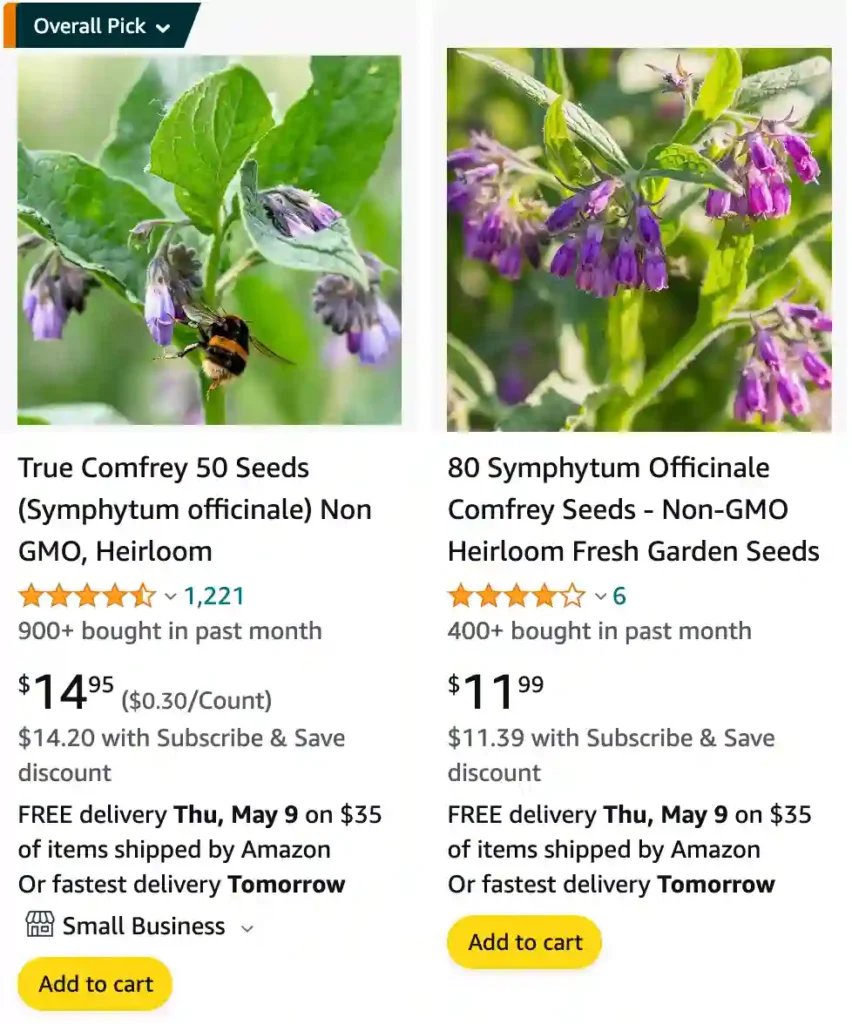
I came across a whole patch of comfrey plants last summer while hiking by a stream. They were hard to miss! They stood out from the wildflowers with their big, fuzzy leaves. They felt surprisingly rough when I brushed against them, kind of like sandpaper. The leaves themselves were long and pointy, with crinkled edges. They grew in a bushy clump, and above them drooped these clusters of little purple bell-shaped flowers. It looked a bit messy, but the bees seemed to love them!
Where to buy comfrey plants?
Online retailers like Amazon offer comfrey plants, but I’m not sure that’s the best route. You never quite know what you’re getting with mail-order plants. Last year, I had much better luck finding healthy comfrey at a local nursery. The staff were really knowledgeable and helped me pick out a strong plant. Plus, it was fun to browse all the other interesting options they had! If you have a local nursery or garden center nearby, I’d definitely recommend checking them out first.
How to make comfrey salve?
I actually just whipped up a batch of comfrey salve last month! It’s easier than I thought it would be. There are two ways to go about it: infusing the oil with fresh leaves or using dried ones. This time, I went with the fresh leaves. I packed a jar with chopped comfrey leaves from my garden, then covered them completely with olive oil. I left it on a sunny windowsill for a few weeks, shaking it every day. The oil turned a beautiful golden color! Then, I strained out the leaves and simmered the oil gently with some beeswax pastilles until it melted. Once it cooled, I poured the salve into tins. It’s a simple process, but it feels so rewarding to use a salve I made myself from scratch!
Where does comfrey grow?
In my experience, comfrey seems to be a bit of a wanderer! I’ve seen it pop up in a surprising number of places. The first time I noticed it was growing wild by a stream, like I mentioned before. The moist soil and partial shade seemed perfect for it. But I’ve also seen it growing happily in full sun in a friend’s garden bed. It seems pretty adaptable as long as it has good soil and some moisture. Apparently, it can even handle some neglect once it’s established!
Is comfrey invasive?
Yes, comfrey can be quite invasive in certain areas. While it can be a great addition to your garden, its eagerness to spread can become a problem.
Here’s why:
- Spreads easily: Comfrey reproduces readily from its roots. Even a tiny fragment left behind from digging can sprout into a whole new plant. This makes it hard to control where it grows.
- Shades out competitors: Comfrey’s large leaves can block sunlight from reaching other plants, hindering their growth and potentially crowding them out.
- Tough to eradicate: Its extensive root system makes it very difficult to remove completely once established. Trying to dig it up can just break the roots into even more pieces, creating more plants!
If you’re thinking about planting comfrey, it’s wise to check with your local authorities first. They may have restrictions on planting it in certain areas due to its invasive potential.
Here are some alternatives to consider if comfrey is on your list but you’re worried about it spreading:
- Comfrey varieties that are sterile – These won’t produce seeds and are much less likely to take over your garden.
- Lungwort – This shade-loving perennial has similar fuzzy leaves and purple flowers to comfrey, but it’s not invasive.
- Borage – Another borage family member, borage is a self-seeding annual with beautiful blue flowers that are attractive to bees.
Is comfrey safe for dogs?
While comfrey has some potential benefits for wound healing, I wouldn’t recommend using it on my dog. I know it can be tempting to try natural remedies, but I’ve read that comfrey contains pyrrolizidine alkaloids, which can be toxic to the liver in large amounts. Even a small amount could be risky, especially if my dog ingested it accidentally.
On the other hand, my vet recommended a great aloe vera spray for minor skin irritations. It’s safe and seems to soothe his itchy spots quickly. If you’re looking for a natural way to help your furry friend, I’d definitely talk to your vet about some safer options.
How to harvest comfrey?
Harvesting my comfrey has become a regular summer ritual! Here’s what I’ve learned:
- Timing is key: I aim for my first harvest when the plant reaches about two feet tall, usually sometime in early summer. You can get a second harvest later in the season, around September, but make sure to leave some foliage for the plant to rebuild its strength.
- Sharp tools are your friend: I use sharp hand shears or secateurs to cut the stems cleanly. A dull blade can damage the plant, so make sure yours are nice and sharp.
- A low cut, but not too low: I cut the stems at about two inches above the soil level. This encourages new growth to come in quickly. Be careful not to cut any lower or you might damage the crown of the plant.
- Respect the plant: I avoid taking more than half the plant’s foliage at any one time. This ensures the plant stays healthy and can keep producing leaves throughout the season.
- Young leaves are best: For fresh use, I target the younger, more tender leaves. They’re less hairy and have a milder flavor.
How to make comfrey oil?
There are two main ways I’ve made comfrey oil, depending on whether you have fresh or dried comfrey on hand. Both are pretty straightforward!
Using fresh comfrey leaves:
- Gather and prepare: Head out to your comfrey patch and snip off some fresh leaves. Wash them gently and pat them dry. Chopping or crushing the leaves a bit can help them release their beneficial properties into the oil more readily.
- Fill a jar: Pack a clean jar, around 2/3 full, with the prepared comfrey leaves.
- Choose your carrier oil: Pour a carrier oil like olive oil or jojoba oil over the leaves to completely submerge them.
- Sun infusion: Place the jar in a sunny spot for 4-6 weeks. Shake the jar gently every day to help distribute the goodness throughout the oil.
- Straining and storage: After infusion, strain the oil through cheesecloth to remove the plant material. Store your finished comfrey oil in a cool, dark place like a cabinet.
Using dried comfrey:
- Grind it up: If you’re using dried comfrey root or leaves, you’ll want to grind them into a powder first. A mortar and pestle or a spice grinder work well for this.
- Jar and oil: Fill your jar about halfway with the powdered comfrey. Then, cover it completely with your chosen carrier oil.
- Heat infusion (optional): This method is a bit faster than sun infusion. You can gently simmer the oil and comfrey mixture on low heat for 30 minutes to an hour. Just be careful not to overheat it!
- Strain and store: As with the fresh version, strain the oil through cheesecloth to remove the plant material. Store your finished comfrey oil in a cool, dark place.
Whichever method you choose, be sure to label your comfrey oil with the date you made it. Generally, homemade infused oils like this will last for several months up to a year if stored properly.
Is comfrey a perennial?
You betcha! Comfrey is a true perennial. That’s what first drew me to it actually. After planting it once, it keeps coming back year after year. In the fall, the foliage dies back, but don’t worry, it’s not gone for good. Those tough roots underground are just taking a break. Come spring, vibrant green shoots will emerge again, ready to grow into another full and bushy plant. It’s a real trooper!
Can chickens eat comfrey?
Absolutely, chickens can enjoy comfrey in moderation! It can be a great addition to their diet for a few reasons:
- Nutrient Powerhouse: Comfrey is packed with protein, vitamins, and minerals that are beneficial for chickens. It’s relatively low in fiber compared to other greens, making it easier for them to digest and absorb those nutrients.
- Happy Hens, Rich Yolks: The beta-carotene in comfrey can contribute to a deeper yellow color in egg yolks.
- Natural Remedy: Some folks even use comfrey topically as a poultice for minor cuts or skin irritations on their chickens.
However, a word to the wise:
- Start Slow: Like with any new food, introduce comfrey gradually to avoid any digestive upset.
- Moderation is Key: While comfrey is good for them, it shouldn’t be their main course. Think of it as a tasty treat alongside their regular coop feed.
- Fresh or Dried: You can offer them chopped fresh leaves or sprinkle some dried comfrey flakes on their food.
- Be Wary of Invasive Types: If you’re concerned about comfrey spreading in your yard, there are sterile varieties available that are less likely to take over.
Overall, comfrey can be a nutritious and enriching addition to your chicken’s diet, but remember, moderation is key!
How long does comfrey take to grow from seed?
Comfrey germination can take some patience, depending on the conditions. Here’s what I’ve experienced:
- Optimal conditions: If you have a greenhouse or a well-controlled indoor space with warm temperatures (around 68-72°F or 20-22°C), seeds can sprout in as little as 10-14 days.
- Regular sowing: Indoors or outdoors in suitable climates, with good soil moisture and warmth, germination usually takes around 25-30 days.
- Playing the waiting game: Don’t despair if it takes even longer, especially outdoors. Depending on the weather and soil temperature, it could be closer to 40 days before you see those first green shoots.
Here’s a tip that some folks recommend: some gardeners say that stratifying the seeds (giving them a cold period to simulate winter) before planting can improve germination rates. You can research this method if you’re feeling adventurous!
While the initial sprout might be quick, keep in mind that comfrey takes a while to mature. You won’t get a full harvest until the second year after planting. But hey, the good news is that once established, this perennial keeps coming back year after year!
How to identify comfrey?
Identifying comfrey can be pretty straightforward, especially if you keep these key features in mind:
- Fuzzy Friends: Comfrey leaves are easily recognizable for their fuzzy texture. They’re covered in soft hairs on both the upper and lower surfaces, giving them a rough, almost sandpapery feel.
- Leaf Shape: The leaves themselves are large and oval, with pointed tips and slightly crinkled edges. They grow in a spiral pattern around the stem, forming a bushy clump.
- Flower Power: Comfrey blooms in clusters of small, bell-shaped flowers. The color can vary depending on the species, but they’re most commonly pinkish-purple or a creamy white with purple streaks.
- Habitat: Look for comfrey in moist areas with good sun or partial shade. It thrives near streams, ditches, and waste ground, but can also pop up in gardens.
Here are some additional tips for identifying comfrey:
- Beware of Look-alikes: A young comfrey plant can be mistaken for foxglove (Digitalis purpurea) in early spring. However, foxglove leaves have smooth edges and lack the noticeable fuzziness of comfrey.
- Check the Stem: Comfrey’s stem is thick, hollow, and often grooved. It’s also covered in those same soft hairs as the leaves.
- Feel Free to Feel: Don’t be afraid to gently brush a leaf between your thumb and fingers. The distinctive fuzziness is a sure giveaway that you’re looking at comfrey.
If you’re still unsure, it’s always best to err on the side of caution and not harvest anything unless you can confidently identify it as comfrey. There are some resources online with detailed pictures that can help you compare and confirm your findings.
How to make comfrey poultice?
Making a comfrey poultice is a great way to use fresh comfrey leaves directly on the skin. Here’s how I do it:
Gathering your supplies:
- Fresh comfrey leaves – make sure they’re clean and free of debris.
- Mortar and pestle (or a blender/food processor)
- Bowl
- Muslin cloth or cheesecloth
- Bandage or securing material
Mashing the comfrey:
- Wash and dry: Gently wash the comfrey leaves to remove any dirt or insects. Pat them dry with a clean cloth.
- Mortar and pestle method: This is the traditional way. Place a handful of leaves in your mortar and grind them with the pestle until you have a smooth paste.
- Blender/food processor method: If you prefer a quicker method, chop the leaves roughly and add them to your blender or food processor. With a little pulsing or blending, you can achieve a similar paste-like consistency.
Preparing the poultice:
- Add a little water (optional): The consistency of the paste should be thick and spreadable. If needed, add a few drops of water at a time to achieve the right texture.
- Forming the poultice: Spread the comfrey paste onto a piece of muslin cloth or cheesecloth. Make sure the layer is thick enough to provide good coverage for the affected area.
Applying and securing the poultice:
- Clean the affected area: Gently cleanse the area where you’ll be applying the poultice with clean water.
- Apply the poultice: Place the comfrey-coated cloth directly onto the skin.
- Secure it in place: Wrap a bandage or other securing material around the area to hold the poultice in place. It shouldn’t be too tight, but snug enough to stay put.
Here are some additional tips for using a comfrey poultice:
- Fresh is best: For the most potent poultice, use fresh comfrey leaves as soon as possible after harvesting.
- Leave it on: Apply the poultice for 20-30 minutes, two or three times a day.
- Listen to your body: If you experience any irritation, remove the poultice immediately.
- Don’t reuse: Make a fresh poultice for each application.
- Consult a healthcare professional: While comfrey is generally considered safe for topical use, it’s always wise to consult with your doctor before using it, especially if you have any underlying health conditions or open wounds.
Remember: Comfrey shouldn’t be ingested internally due to potential liver toxicity concerns.
How to make comfrey tea?
Making comfrey tea is a breeze! There are two main approaches, depending on whether you want a fertilizer tea for your plants or a tea for topical use. Here’s a breakdown for both:
Comfrey fertilizer tea:
This is a great way to nourish your plants with the beneficial nutrients found in comfrey leaves.
- Ingredients:
- Fresh comfrey leaves (or 1-2 bags of dried comfrey, if using)
- Large bucket or container
- Water
- Instructions:
- Fresh leaves: If using fresh leaves, roughly chop or tear them up a bit. This will help them release their nutrients more readily into the water.
- Fill the bucket: Pack the bucket loosely with the chopped comfrey leaves, filling it about 1/3 to ½ full. If using dried comfrey bags, simply add them whole.
- Water it in: Fill the bucket completely with water. Make sure all the plant material is submerged.
- Steep it: Cover the bucket and place it in a sunny location for several weeks (around 2-4 weeks is typical).
- Dilution is key: Before using the tea on your plants, dilute it with water at a ratio of 1 part comfrey tea to 10 parts water. This helps prevent burning your plants.
- Use it or store it: You can use the diluted tea immediately to water your plants, or store the concentrated tea in a sealed container for later use (up to a year).
Comfrey tea for topical use:
Important Disclaimer: While some people use comfrey tea topically for minor skin irritations, it’s important to note that ingesting comfrey can be toxic to the liver. Consult with a healthcare professional before using comfrey tea topically, especially for open wounds or if you have any underlying health conditions.
- Ingredients:
- Fresh comfrey leaves (or 1-2 teaspoons of dried comfrey)
- Hot water
- Strainer
- Washcloth (optional)
- Instructions:
- Fresh or dried: If using fresh leaves, wash them gently and pat them dry. If using dried comfrey, measure out the desired amount.
- Steeping: Place the comfrey leaves (fresh or dried) in a mug or heat-resistant container. Pour hot water over them and let it steep for 10-15 minutes.
- Strain it: Strain the tea through a strainer to remove the plant material.
- Cooling down: Allow the tea to cool completely before using it topically.
- Soaking or compressing: You can use a clean washcloth soaked in the cooled tea to apply it to the affected area. Alternatively, you can pour the cooled tea directly onto the area for a compress.
Here are some additional tips for making comfrey tea:
- Fresh is best: For the most potent tea, use fresh comfrey leaves as soon as possible after harvesting.
- Don’t reuse the tea: Make a fresh batch of tea for each use.
- Patch test: If using topically, do a patch test on a small area of your skin first to check for any irritation.
Remember, while comfrey tea has some potential benefits, it’s crucial to be aware of the safety considerations before using it, especially for topical applications.
Species within the Symphytum Genus
The Symphytum genus comprises around 33 recognized species. Some of the most notable ones include:
- ** Symphytum officinale** (Common Comfrey): This is perhaps the most well-known species, characterized by its bell-shaped, purple or creamy yellow flowers and large, hairy leaves. It’s been widely used in traditional medicine for wound healing and bone setting.
- ** Symphytum asperum** (Prickly Comfrey): Distinguished by its prickly stems and blue or purple flowers, this species is often used as a fodder crop due to its high protein content.
- ** Symphytum tuberosum** (Tuberous Comfrey): This species is unique for its tuberous roots and creamy yellow flowers. It’s less common than other species and tends to prefer woodland habitats.
- ** Symphytum grandiflorum**: This species is a popular ornamental plant, favored for its attractive, bell-shaped flowers that range in color from white to blue and purple.
- ** Symphytum caucasicum** (Caucasian Comfrey): Originating from the Caucasus region, this species is known for its vigorous growth and blue flowers. It’s often used in gardens as a ground cover.
- Symphytum aintabicum Hub.-Mor. & Wickens
- Symphytum anatolicum Boiss.
- Symphytum × bicknellii Buckn.
- Symphytum bornmuelleri Buckn.
- Symphytum brachycalyx Boiss.
- Symphytum bulbosum K.F.Schimp.
- Symphytum carpaticum Yu.M.Frolov
- Symphytum circinale Runemark
- Symphytum cordatum Waldst. & Kit. ex Willd.
- Symphytum creticum (Willd.) Runemark
- Symphytum davisii Wickens
- Symphytum × ferrariense C.Massal.
- Symphytum gussonei F.W.Schultz
- Symphytum hajastanum Gvin.
- Symphytum ibiricum Steven
- Symphytum kurdicum Boiss. & Hausskn.
- Symphytum longisetum Hub.-Mor. & Wickens
- Symphytum × mosquense S.R.Majorov & D.D.Sokoloff
- Symphytum orientale L.
- Symphytum ottomanum Friv.
- Symphytum podcumicum Yu.M.Frolov
- Symphytum pseudobulbosum Azn.
- Symphytum savvalense Kurtto
- Symphytum sylvaticum Boiss.
- Symphytum tauricum Willd.
- Symphytum × ullepitschii Wettst.
- Symphytum × uplandicum Nyman
- Symphytum × wettsteinii Sennholz
Comfrey’s Traditional Uses and Modern Applications
Historically, comfrey was a staple in traditional medicine, employed for a variety of ailments. Poultices and ointments made from comfrey roots and leaves were applied to wounds, burns, and fractures to accelerate healing. It was also ingested to treat internal issues like ulcers and respiratory problems.
While modern medicine has largely replaced traditional remedies, comfrey still holds relevance today. Its high allantoin content makes it a valuable ingredient in skincare products, promoting skin cell regeneration and soothing irritation. In organic gardening, comfrey is prized as a fertilizer and compost activator due to its rich nutrient content.
Cautions and Considerations
Despite its beneficial properties, it’s important to note that comfrey contains pyrrolizidine alkaloids, which can be toxic to the liver if ingested in large quantities or over prolonged periods. Therefore, internal consumption of comfrey is generally discouraged. When applied topically, it’s advisable to perform a patch test first to rule out any allergic reactions.
My Personal Connection with Comfrey
My interest in comfrey stems from a deep appreciation for natural remedies and sustainable practices. I’m intrigued by its long history of use and its potential to contribute to both human health and environmental sustainability. I believe that further research into comfrey’s properties could lead to the development of new and innovative applications in medicine, cosmetics, and agriculture.
Conclusion
Comfrey, with its diverse species and multifaceted uses, stands as a testament to the power of nature. While its traditional applications have evolved, its potential remains vast. As we continue to explore the intricate world of plants, comfrey serves as a reminder of the valuable resources that lie within our grasp, waiting to be discovered and utilized responsibly.
