My Journey with Japanese Maple – Acer Palmatum
The Japanese Maple, Acer palmatum, has always captivated me with its elegance and timeless beauty. As someone who cherishes gardening, this tree isn’t just a plant in my landscape; it’s a centerpiece that transforms my garden into a seasonal masterpiece. From its delicate foliage to its stunning color transitions, every aspect of this tree tells a story. Let me take you through my experience and thoughts on cultivating and appreciating this iconic tree.
168 Species in Genus Acer – Maple Tree
Discovering the Beauty of Japanese Maples
My fascination with the Japanese Maple began when I first saw one at a botanical garden. Its finely dissected leaves, glowing with fiery reds and oranges, stood out amidst the greenery. I remember thinking, How could nature create something so perfect? That moment sparked my desire to learn more about these trees and eventually plant one in my garden.
Acer palmatum is native to Japan, Korea, and parts of China, where it holds cultural and aesthetic significance. It’s often featured in traditional Japanese gardens, symbolizing serenity and harmony. For me, having this tree in my garden felt like bringing a piece of that peaceful essence home.
Planting My First Japanese Maple
When I decided to plant my first Japanese Maple, choosing the right variety was a delightful challenge. With hundreds of cultivars available, each boasting unique leaf shapes, colors, and growth habits, I felt like a kid in a candy store. I finally settled on ‘Bloodgood’, a classic variety known for its vibrant red foliage and robust growth.
Planting it was an experience in itself. I carefully selected a spot that offered dappled sunlight, mimicking the tree’s natural understory habitat. Well-draining soil was another essential factor; these trees despise standing water. I mixed compost into the soil to enhance its fertility and dug a wide, shallow hole to accommodate the Maple’s fibrous root system. As I settled the sapling into its new home, I couldn’t help but feel a sense of anticipation for the beauty it would bring.
Caring for Acer Palmatum
Japanese Maples are surprisingly low-maintenance once established, but they do demand attention to detail. In my experience, watering is critical during the first few years. I made it a point to water deeply but infrequently, ensuring the roots grew strong and deep. Mulching around the base helped retain moisture and regulate soil temperature—an essential step for these delicate trees.
Pruning is another aspect I’ve come to enjoy. With Acer palmatum, less is often more. I prune sparingly, removing dead or crossing branches to maintain its graceful shape. Each snip feels like sculpting a living artwork, bringing out the best in the tree’s natural form.
Seasonal Splendor
One of the greatest joys of having a Japanese Maple is watching it change through the seasons. In spring, my ‘Bloodgood’ unfurls fresh, crimson leaves that look almost translucent in the sunlight. Summer deepens the red tones, giving my garden a rich, regal feel. Then comes autumn—a season where Acer palmatum truly shines. The foliage transforms into an explosion of scarlet, orange, and gold, as if the tree is bidding farewell to the year with a grand finale.
Winter has its charm too. Stripped of its leaves, the Japanese Maple reveals its intricate branching structure. Against a backdrop of frost or snow, it becomes a piece of natural sculpture, offering beauty even in dormancy.
Lessons Learned
Growing a Japanese Maple has taught me patience and mindfulness. These trees don’t rush. They grow steadily, rewarding you with incremental beauty year after year. Watching mine mature has been a reminder to appreciate life’s small, gradual changes.
I’ve also learned the importance of pairing plants in the landscape. Under my Maple, I’ve planted Hostas and Ferns, which thrive in its shade and create a lush, layered effect. Moss carpets the ground, adding a touch of serenity reminiscent of a Japanese Zen garden.
Recommendations for Fellow Enthusiasts
If you’re considering adding a Japanese Maple to your garden, I can’t recommend it enough. Choose a cultivar that suits your space and climate—some are compact, perfect for small gardens, while others can grow into striking, multi-stemmed trees. Remember, the key to success lies in proper planting, consistent care, and patience.
For me, Acer palmatum has been more than a tree. It’s a connection to nature, a canvas of seasonal art, and a source of endless joy. Whether you’re a seasoned gardener or a beginner, I believe this tree has something to offer everyone. It’s not just a plant; it’s a lifelong companion in the garden.
FAQs
When to plant Japanese maple?
When it comes to planting a Japanese maple, I learned the hard way that fall is the best bet! A few years ago, I got all excited and planted one in spring. It seemed to do well for a while, but then the harsh summer sun really scorched the leaves. I tried my best to keep it watered and shaded, but it never fully recovered. Since then, I’ve always planted my Japanese maples in the fall. They get a chance to settle in before winter and seem to really thrive when the spring growing season rolls around.
Do deer eat Japanese maple?
In my experience, deer tend to leave my Japanese maples alone for the most part. They’re definitely not their first choice for a meal! I’ve noticed they much prefer munching on the roses and hostas around them. That being said, there was one brutal winter a few years back when food seemed scarce. I caught a glimpse of a deer nibbling on the new growth on my younger Japanese maple. Luckily, it wasn’t enough to cause any lasting damage, but it is a reminder that even deer will resort to less desirable options if they’re hungry enough.
How much are Japanese maple trees?
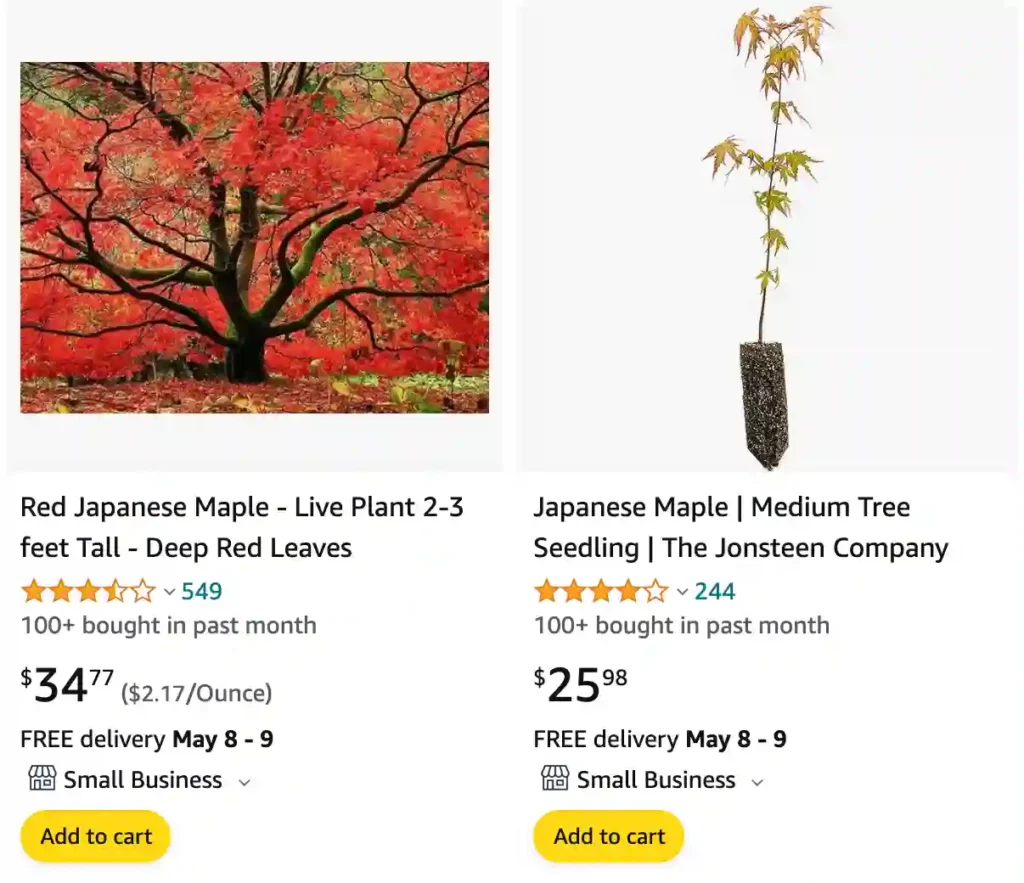
The price of Japanese maple trees can vary quite a bit, depending on where you shop and the size and variety of the tree. I’ve seen them for as little as $40 for a small one in a pot at a local garden center, but some specialty varieties can cost hundreds or even thousands of dollars online or at dedicated nurseries. It all depends on what you’re looking for! For my first Japanese maple, I went with a mid-sized Bloodgood from a reputable nursery and paid around $150. It’s grown beautifully and the fiery red leaves are stunning every fall. You can definitely find a beautiful Japanese maple to fit your budget!
When to prune dwarf Japanese maple?
With my dwarf Japanese maples, I’ve found that winter pruning works wonders for shaping them up, but there’s a bit more flexibility than with regular sized trees. Since they’re smaller, it’s easier to see the branch structure without leaves, which makes winter ideal for heavier pruning to control the overall shape. However, I’ve also had good luck with minor trims in late spring, after the new leaves emerge. This lets me fine-tune the shape and remove any wayward branches that might be spoiling the look. For larger branch removal or if I notice any dead or diseased wood, I don’t hesitate to prune in summer as well. The key for me is to take it slow and not overdo it, especially with the smaller cuts. These little guys can be surprisingly dramatic if you take off too much at once!
Does Japanese maple lose its leaves?
Absolutely! My Japanese maples are like clockwork with their dazzling fall display and then losing their leaves in winter. It’s always a breathtaking sight to see the leaves turn fiery red, orange, and even purple before fluttering down. While it might seem a little sad to see them go bare, it’s a natural part of their cycle and the vibrant show beforehand makes it all worth it. Plus, the bare branches have a certain elegance in the winter landscape, and I can’t wait to see the new growth burst forth again come spring.
How to grow a Japanese maple from seed?
Growing a Japanese maple from seed can be a fun and rewarding experience, but it definitely requires some patience! Here’s what I’ve learned through trial and error:
First things first, be prepared to wait. Japanese maple seeds need a cold spell to mimic winter before they’ll germinate. This process, called stratification, can be done naturally by planting the seeds in a pot in fall and leaving them outdoors over winter. But, if you live in a warmer climate or just want more control, you can mimic this process by placing the seeds in a moist, sandy mix in a sealed plastic bag and storing them in your refrigerator for a few months.
Once the stratification period is over, you can plant the seeds in a well-draining potting mix and keep them moist but not soggy. Here’s the tricky part: germination can take anywhere from a few weeks to several months, so don’t despair if you don’t see sprouts right away. Just keep the soil moist and provide some protection from harsh sunlight.
With a little luck, you should eventually see some tiny seedlings emerge. This is when the real patience comes in! Japanese maples grow slowly, so it can take several years before your little seedling matures into a decent-sized tree. But the satisfaction of nurturing a tree from seed to maturity is pretty amazing!
Can Japanese maple trees be planted in full sun?
Japanese maples in full sun? It can be tricky! While mine can handle some morning sun, the afternoon heat can be brutal. I learned this the hard way with a beautiful young maple that got scorched leaves in the summer sun. Luckily, most Japanese maples seem to do best with dappled shade or filtered sunlight, especially in hotter climates. This gives them some protection from the harsh afternoon rays but still allows them enough sun for good growth and vibrant fall color. If you’re set on a full sun location, there are some heat-tolerant varieties out there, but be sure to research the specific needs before planting and be prepared to provide extra watering during hot spells.
What to grow under Japanese maple trees?
Picking plants for under my Japanese maples is all about shade tolerance and moisture needs. Since their leaves cast a dappled shade, it’s not perfect darkness but definitely not full sun either. Hostas have become my go-to! Their big, beautiful leaves come in all sorts of colors and patterns, and they seem to thrive in the same moist, well-draining soil that Japanese maples prefer. Ferns are another great option. Their delicate fronds add a lovely textural contrast to the bolder maple leaves, and they appreciate the shade and moisture as well. For some springtime color, I’ve had good luck with shade-loving perennials like columbine and bleeding hearts. They add a pop of color in early spring before the Japanese maple leaves unfurl completely. Just remember to choose plants that won’t compete too aggressively for moisture with your Japanese maples, and you’ll have a thriving understory!
Why is my Japanese maple dying?
I can’t say for sure why your Japanese maple might be dying without seeing it myself, but there are a few things you can check based on my own experiences.
Overwatering is a common culprit. Japanese maples prefer moist soil, but not soggy roots. Stick your finger in the soil a few inches down. If it feels dry, it’s watering time. If it feels damp or muddy, hold off.
Another possibility is underwatering, especially during hot weather. They like consistent moisture, so if it’s been dry and the leaves are wilting or curling, give it a good soak.
Sunlight also plays a big role. While some morning sun is okay, too much afternoon sun can scorch the leaves. If your maple is planted in full sun, consider providing some shade or choose a heat-tolerant variety.
Take a look at the leaves for signs of disease or pests. If they’re discolored, wilting, or have holes, it might be something you can treat.
Finally, check the base of the tree for signs of damage or disease. If the bark looks discolored or mushy, it could be a more serious issue.
If you’re still not sure what’s wrong, you can take a picture or sample of a leaf to your local nursery and see if they can offer some advice. Good luck!
How tall is a Japanese maple?
It depends! Japanese maples come in all sorts of sizes, from teeny tiny dwarf varieties to some real showstopper trees. I’ve seen bonsai-sized ones that stay under 3 feet tall even at maturity, perfect for containers on a patio. Then there are the upright varieties that can grow 15 to 25 feet tall, ideal for adding a splash of color in a larger garden. There’s even a variety called the Coral Bark Maple that can reach up to 30 feet tall, perfect if you’re looking for a statement piece! The key is to choose the right variety for your space and desired look.
When to transplant a Japanese maple?
The best time to transplant a Japanese maple is during its dormant period, which is typically in late winter or very early spring, just before the buds begin to swell. Here’s why this timing is ideal:
Reduced stress: The tree’s energy is focused on surviving the winter, not actively growing new leaves or roots. This minimizes the stress of transplanting and allows the tree to focus its energy on establishing its new root system.
Cooler temperatures: Cooler spring temperatures help reduce moisture loss from the leaves, which is crucial for a recently transplanted tree with a compromised root system.
Root growth: The cool, moist soil conditions of early spring are perfect for root growth, allowing the Japanese maple to establish itself quickly in its new location.
While transplanting in fall is technically possible, it’s generally not recommended, especially in colder climates. The tree has less time to establish its roots before winter arrives, making it more susceptible to transplant shock and winter damage.
How often to water Japanese maple?
Watering your Japanese maple depends on a few factors, but here’s a general guideline based on my experience:
Newly planted trees: These thirsty guys need more frequent watering, like every 1-3 days for the first month after planting. Gradually reduce the frequency to once a week for the first growing season.
Established trees: For mature Japanese maples in the ground, aim for consistent moisture but not soggy soil. Water deeply twice a week during normal weather, and increase to 3-4 times a week during hot, dry spells.
Container trees: These dry out faster than trees in the ground. Plan to water them 3-4 times a week, depending on the temperature and how quickly the pot drains.
Here’s my secret weapon for knowing when to water: the finger test! Stick your finger a couple of inches into the soil. If it feels dry, it’s watering time. If it feels damp or muddy, hold off. This method helps ensure you’re watering deeply but not drowning the roots.
Remember, these are just guidelines. Always be observant and adjust your watering routine based on your specific climate, weather conditions, and the size and maturity of your Japanese maple.
How to fertilize Japanese maple?
Here’s the thing about fertilizing Japanese maples: they’re not big fans of a heavy hand! Overfertilizing can actually damage the tree, so it’s better to err on the side of less.
Here’s my fertilizing routine that seems to keep my Japanese maples happy and healthy:
Timing is key: I fertilize in early spring, just before the new leaves emerge. This gives the tree a little boost of nutrients as it starts to grow for the season.
Less is more: I use a slow-release fertilizer formulated for Japanese maples, and I only apply a half dose of what the package recommends. These trees don’t need a lot of extra nutrients to thrive.
Slow and steady wins the race: Slow-release fertilizer is the way to go. It feeds the tree gradually over time, preventing any spikes that could damage the roots.
Organic option: If you prefer a more natural approach, you can add a few inches of composted manure or composted leaves around the base of the tree in early spring. This will slowly decompose and provide a gentle nutrient boost.
Remember, a healthy soil is key for a healthy Japanese maple. Amending the soil with organic matter when planting or transplanting goes a long way in providing the nutrients your tree needs over time. By following these tips and keeping an eye on your tree, you can find the perfect fertilizing routine to keep your Japanese maple flourishing!
How to graft a Japanese maple?
Grafting a Japanese maple can be a bit tricky, but it’s a rewarding way to propagate a special cultivar or create a multi-colored tree. Here’s what I’ve learned from my own attempts (and some helpful resources!):
Before you begin:
Timing is crucial: The best time to graft a Japanese maple is in late winter or early spring when the tree is dormant but just before buds begin to swell. This allows for optimal sap flow, which is essential for successful grafting.
Gather your tools: You’ll need a sharp knife, grafting tape, and pruners. Consider using a grafting tool for cleaner cuts, but a sharp knife will work in a pinch.
Choose your rootstock and scion: The rootstock is the established Japanese maple tree that will provide the root system. Select a healthy rootstock with a diameter slightly larger than the scion (the cutting you’re taking from the desired cultivar). The scion should be a healthy, one-year-old shoot from the Japanese maple variety you want to propagate.
Making the graft:
Prepare the rootstock: Make a clean, diagonal cut about 1-2 inches long on a branch of the rootstock. Aim for a smooth, 45-degree angle cut that exposes the cambium layer, the green tissue just beneath the bark.
Prepare the scion: Make a matching diagonal cut on the base of the scion, ensuring the cambium layers of the rootstock and scion align as closely as possible.
Join the rootstock and scion: Carefully push the scion wedge into the prepared cut on the rootstock, ensuring good cambium layer contact.
Secure the graft: Wrap grafting tape firmly but carefully around the graft union, completely sealing the wound.
Aftercare:
Protect the graft: Cover the grafted area with a plastic bag to maintain humidity and prevent the scion from drying out. You can poke a few small holes for ventilation.
Monitor closely: Keep the grafted tree in a protected location with indirect sunlight. Regularly check on the graft union for signs of growth, such as new buds emerging from the scion.
Be patient: Grafted trees can take several weeks or even months to show signs of success. Remove the plastic bag once new growth appears and continue to provide care as you would for a normal Japanese maple.
How to move a Japanese maple without killing it?
Moving a Japanese maple can be stressful for the tree, but with careful planning and execution, you can significantly increase its chances of thriving in its new home. Here’s what I’ve learned from successfully transplanting mine:
Timing is key: The best time to move your Japanese maple is during its dormant period, ideally in late winter or very early spring. The tree’s energy is focused on surviving the winter, not actively growing new leaves or roots. This minimizes transplant shock and allows the maple to focus on establishing its new root system come spring.
Prepare the new planting site: Choose a location with well-draining soil and dappled sunlight, especially if you live in a hot climate. Avoid areas with strong winds or constant afternoon sun. Dig a new planting hole 2-3 times wider than the root ball of your Japanese maple. Loosen the soil at the bottom of the hole to encourage root growth.
Minimize root damage: Carefully excavate the Japanese maple from its current location. The wider the area you can dig around the base, the more of the root system you’ll preserve. Aim to go out at least 1 foot beyond the drip line (the outer edge of the branches). Use a sharp shovel or saw to cut through any thick roots you encounter.
Protect the root ball: Once you’ve loosened the soil around the root ball, carefully wrap it in burlap or landscaping fabric to hold it together during transport.
Prune strategically: Moving is a stressful experience for a tree, so it’s wise to reduce the amount of foliage it needs to support. Prune away about 25% of the branches, focusing on removing any dead, diseased, or overcrowded branches. This will help the tree focus its energy on establishing its roots in the new location.
Planting the tree: Carefully place the Japanese maple in the prepared planting hole, ensuring the root ball sits level with the surrounding soil. Backfill the hole with the excavated soil, gently tamping it down to remove air pockets. Water the tree deeply to settle the soil around the roots.
Aftercare is crucial: Water your newly transplanted Japanese maple regularly, especially during the first growing season. Aim to keep the soil consistently moist but not soggy. Apply a layer of mulch around the base of the tree to retain moisture, suppress weeds, and regulate soil temperature. Monitor the tree for signs of stress, such as wilting or leaf scorch, and adjust your watering or shading accordingly.
Be patient: It can take a Japanese maple a year or two to fully recover from transplanting. Be patient and provide proper care during this time to give your tree the best chance of success in its new home.
Can you grow Japanese maple indoors?
Growing a Japanese maple indoors can be a bit of a challenge, while it’s not impossible. They’re accustomed to the natural cycle of outdoor seasons, and mimicking those conditions indoors takes some effort. Here’s my experience:
Light is crucial: Japanese maples thrive on bright, indirect sunlight outdoors. Indoors, replicating this can be tough. South-facing windows with strong light might be too harsh, potentially scorching the leaves. East or north-facing windows with filtered light might be a better option.
Humidity matters: Outdoor humidity levels are generally higher than what we have in our homes, especially during winter. Dry indoor air can stress a Japanese maple. You can try using a humidifier to increase the moisture around the tree, but be mindful of creating mold problems.
Temperature control is key: Japanese maples go dormant in winter, needing a period of cooler temperatures. This can be difficult to achieve indoors with constant warm heating. A cool basement or sunroom might be a better fit during winter than a warm living room.
Dormancy is important: Even indoors, try to create a period of dormancy by providing cooler temperatures and reducing watering in winter. This simulates their natural cycle and helps them stay healthy.
Limited growth: While you might be able to keep a Japanese maple alive indoors, it likely won’t reach its full potential growth or produce the vibrant fall foliage it’s known for.
Overall, while I’ve seen some people successfully grow Japanese maples indoors with careful attention to light, humidity, temperature, and dormancy, it’s generally not ideal. They’re really outdoor trees that thrive with the natural changing seasons. If you’re set on a beautiful indoor plant, there are other options that might be easier to care for and flourish in your home environment.
Does Japanese maple like acidic soil?
Absolutely! Japanese maples definitely prefer acidic soil conditions. In fact, a pH range of 5.5 to 6.5 is considered ideal for these trees. Here’s why:
Nutrient uptake: Acidic soil helps Japanese maples absorb essential nutrients more effectively. Iron, for example, becomes more available in acidic environments, which is crucial for healthy leaf development and overall tree health.
Reduced nutrient deficiencies: In overly alkaline soil (pH above 7.5), Japanese maples can struggle with nutrient deficiencies, even if the nutrients are present in the soil. The high pH makes it difficult for the tree to absorb them properly.
General health: While Japanese maples can tolerate a wider range of soil pH, thriving in slightly acidic to even neutral conditions, acidic soil seems to promote their overall health and vitality.
If you’re unsure about your soil’s pH level, you can easily purchase a soil testing kit from most garden centers. If your soil leans too alkaline, there are amendments you can add to increase the acidity and create a more favorable environment for your Japanese maple.
What’s eating my Japanese maple leaves?
That’s a bummer to hear about your Japanese maple leaves! There are a few culprits that could be munching on them, and the kind of damage they leave behind can be a clue to who the culprit is:
Japanese Beetles: These are notorious pests for Japanese maples. They’re metallic green and rusty brown with white tufts on their sides. If you see them clinging to the leaves, that’s a dead giveaway. They tend to skeletonize the leaves, leaving behind a lacey network of veins.
Leafhoppers: These tiny green, yellow, or brown insects are hard to spot but can cause a lot of damage. They suck the sap out of leaves, leaving behind pale or mottled spots. If you see these spots and hold a sheet of white paper under the leaves, you might see the leafhoppers jumping off!
Caterpillars: There are various caterpillars that love munching on Japanese maple leaves. The damage they cause can vary depending on the species, but they often leave ragged edges or holes in the leaves. You might even spot them crawling around on your tree.
Earwigs: These nocturnal insects love to hide in moist areas during the day and come out to feed at night. They can leave irregular holes with clean edges on the leaves. You might be able to trap them under rolled-up pieces of cardboard placed near the base of the tree.
Once you identify the culprit, you can take steps to banish them! There are natural options like insecticidal soap sprays or introducing beneficial insects like ladybugs that love to eat aphids. For larger infestations, insecticidal sprays might be necessary, but be sure to follow the instructions carefully and choose a product safe for Japanese maples.
Can Japanese maple grow in pots?
You bet! Japanese maples are actually fantastic choices for growing in pots. Here’s why they’re so well-suited for container gardening:
Compact root system: Unlike some trees that have sprawling roots, Japanese maples have a more fibrous and compact root system. This allows them to thrive in the confines of a pot without becoming rootbound too quickly.
Slow growth: Japanese maples are naturally slow growers, which is perfect for container gardening. This means you won’t have to constantly repot them into larger containers as they mature.
Variety of sizes: There are many varieties of Japanese maples, from dwarf specimens that stay under 3 feet tall to taller varieties that can reach 10-15 feet. This wide range allows you to choose the perfect size tree for your pot and space.
Dazzling display: Even in pots, Japanese maples offer their stunning seasonal beauty. Their vibrant green leaves turn fiery red, orange, or even purple in fall, creating a breathtaking display on your patio or balcony.
Here are some things to keep in mind for growing Japanese maples in pots:
Choose the right pot: Select a pot that’s at least twice the size of the root ball of your Japanese maple. Terracotta pots are a good option because they allow for good drainage, but plastic pots work too, as long as they have drainage holes.
Well-draining soil: Japanese maples don’t like soggy roots. Use a high-quality potting mix specifically formulated for container plants. You can also add some perlite or pumice to improve drainage.
Watering regularly: Container plants dry out faster than those in the ground. Water your Japanese maple regularly, especially during hot weather, allowing the excess water to drain freely from the pot.
Fertilize sparingly: Japanese maples in pots don’t need a lot of fertilizer. A slow-release fertilizer formulated for container trees applied once a year in early spring is usually sufficient.
Winter protection: If you live in a cold climate, consider protecting the pot from harsh winter temperatures by wrapping it in burlap or placing it in a sheltered location.
With a little care, you can enjoy the captivating beauty of a Japanese maple right on your balcony or patio for years to come!
Every time I step into my yard and see my Japanese Maple, I’m reminded of why I fell in love with gardening. It’s about creating beauty, fostering life, and finding peace in the natural world. For me, Acer palmatum embodies all of that—and more.
If i die, water my plants!
