How do self watering pots work?
Self-watering pots have been a game-changer for my forgetful self! They basically have a built-in water reservoir at the bottom, kind of like a mini underground water source for my plants. The coolest part is that the pot itself usually has a little indicator window so you can see when the reservoir is running low. My favorite part is how the plants take what they need. The potting mix sits on top of a separator that keeps it from directly touching the water. Instead, there’s a fabric wick or some kind of porous material that connects the reservoir to the soil. This way, the plant can sip up water as it gets thirsty, and I don’t have to worry about underwatering or overwatering them. It’s been a lifesaver for my peace lilies, which seem to constantly be on the brink of drama if I forget to water them on time.
How to make a self watering planter?
I actually just made a couple of self-watering planters from old containers around the house! It’s surprisingly easy, though it can get a little messy with the soil. There are two main ways I’ve seen people do it. One uses a plastic bottle as a reservoir at the bottom. You cut holes in the sides of the bottle and then fill it with some kind of fabric wick that reaches up into the potting mix. The other way uses a mesh or screen separator to create a false bottom. You fill the bottom part with rocks or something like that to create the reservoir, and then the mesh keeps the soil separate. Whichever way you choose, the key is to have some kind of wicking material that bridges the gap and lets the plant drink when it needs to. It takes a little trial and error to get the wicking just right, but it’s definitely worth it for the peace of mind!
Are self watering pots good?
In my experience, self-watering pots are a double-edged sword. On one hand, they’ve been fantastic for plants that are drama queens about moisture, like my finicky African violets. They never seem to complain about thirst anymore, and I don’t have to worry about accidentally drowning them. Plus, it’s been a lifesaver during travel – no more frantic pleas to my neighbors to play plant sitter!
However, they’re not perfect. It can be tricky to judge how much water the plant actually needs based on the reservoir level. Sometimes the soil feels dry even though there’s water down below. Also, I’ve had some issues with mold gnats when the reservoir gets a bit stagnant. So, while they’re great for some plants and for peace of mind, I wouldn’t say they’re a magic bullet. You might still need to adjust your watering habits a bit depending on the plant and keep an eye out for any moisture or pest problems.
How to make a self watering bottle?
Absolutely! Those plastic soda bottles lying around can be turned into handy self-watering planters. I like this method because it’s super easy and uses recycled materials. Here’s how I’ve done it:
First, grab a clean plastic bottle, size depending on the pot you’re using. A soda bottle works well for smaller plants. Then comes the key part: creating a slow drip irrigation system. You can use a nail or something sharp to poke a small hole in the cap. Don’t go overboard with the size – you want a slow drip, not a gusher! Fill the bottle with water, screw on the cap, and flip the bottle upside down. Now, the fun part – planting! Bury the neck of the bottle in the soil of your pot, making sure the hole is just below the surface. The water will slowly seep out of the cap, keeping the soil moist as the plant drinks. Just remember to pre-water the soil before burying the bottle, and keep an eye on the water reservoir in the bottle so you know when to refill. It’s a simple way to give your plants a drink even when you’re not around!
How to use self watering bulbs?
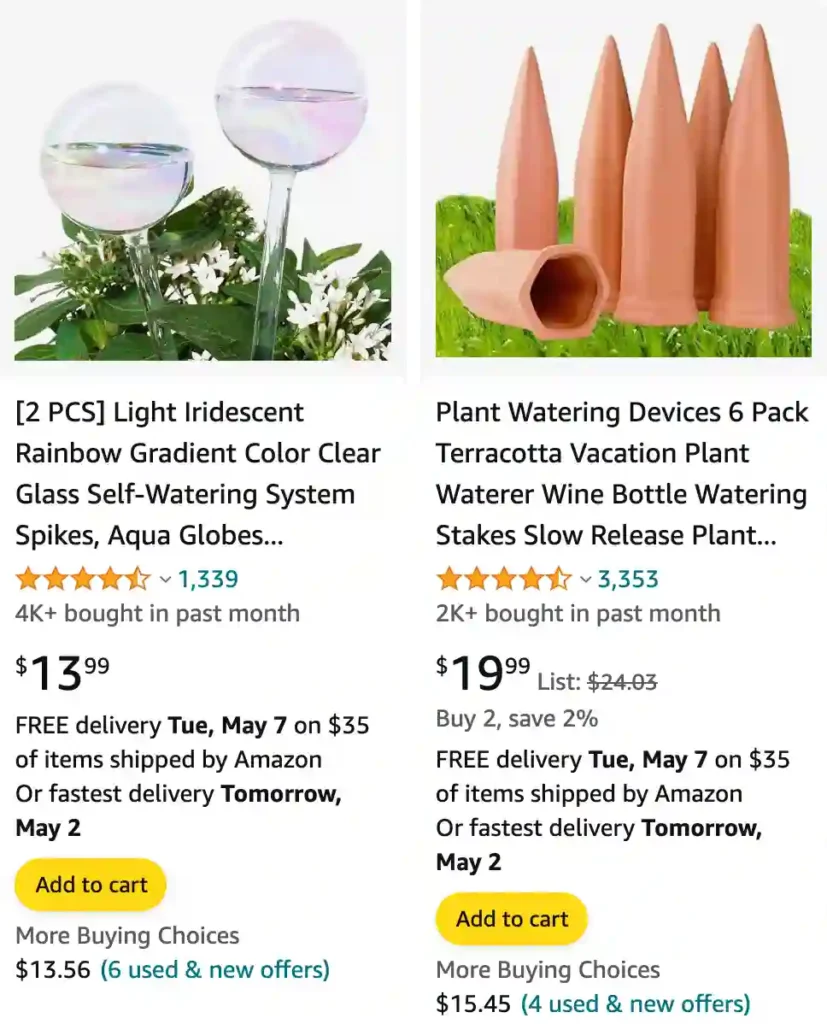
Self-watering bulbs have been a fun addition to my plant care routine! They’re these cute little glass globes, almost like mini terrariums, that help keep my plants hydrated. Using them is pretty straightforward.
First, fill the bulb with water. You can even add some liquid fertilizer if your plant needs a feeding. Then comes the fun part – the slow watering magic! There’s a long, thin neck on the bulb, and that’s what gets shoved into the soil. The trick is to angle the neck slightly so the water doesn’t all rush out at once. Once it’s nestled in the soil, the terracotta tip (at least, that’s what mine have) slowly releases the water into the roots. It’s like a tiny underground watering can!
The best part is you can see the water level in the bulb through the glass. As the water gets used up, the bulb becomes lighter and easier to spot. That’s my signal to refill it! They’re perfect for short trips or for plants that don’t need super frequent watering. They may not be a long-term solution, but they definitely give me peace of mind knowing my plants won’t dry out completely while I’m between waterings.
Do self watering pots cause root rot?
In my experience, self-watering pots themselves don’t necessarily cause root rot, but they can increase the risk if you’re not careful. The key is all about keeping the roots happy and that means good oxygen flow.
I’ve noticed that if I overfill the reservoir, the roots constantly sit in waterlogged soil. That’s a recipe for disaster! Also, some self-watering pots don’t have the best drainage, which can be an issue. To avoid root rot, I’ve learned to only fill the reservoir to a certain level, making sure there’s always a bit of air space at the bottom. Also, I try to choose pots with drainage holes whenever possible, even if they’re self-watering.
Following those tricks, I haven’t had many problems with root rot. But it is definitely something to keep an eye on, especially if you’re new to using self-watering pots. Just be mindful of moisture levels and drainage, and your plants should be happy and healthy!
Are self watering pots good for african violets?
Self-watering pots have been a game-changer for my African violets. These delicate plants thrive on consistent moisture levels, and the self-watering feature ensures they get just the right amount without me having to constantly monitor them. Plus, it’s reduced the risk of overwatering, which can be detrimental to their health.
Are self watering pots good for fiddle leaf figs?
For my fiddle leaf fig, self-watering pots have been a bit of a mixed bag. While they do appreciate consistent moisture, they also prefer a bit more control over their watering schedule. Sometimes the self-watering system can lead to soggy soil, which can cause root rot. So, I’ve found it’s important to monitor the soil moisture carefully and adjust the watering accordingly.
Are self watering pots good for herbs?
Herbs seem to absolutely love self-watering pots. Whether it’s basil, parsley, or mint, these pots provide just the right amount of moisture to keep them thriving without drowning them. Plus, it’s incredibly convenient to have fresh herbs on hand without the hassle of constant watering.
Are self watering pots good for indoor plants?
Indoor plants, in general, have benefited from self-watering pots in my experience. They make plant care much more manageable, especially for busy individuals like myself. I’ve noticed healthier growth and fewer instances of wilting or drying out since switching to self-watering pots.
Are self watering pots good for monstera?
My monstera has flourished in a self-watering pot. These plants have extensive root systems, so the consistent moisture provided by the self-watering feature helps support their growth and overall health. It’s made caring for my monstera much easier and more enjoyable.
Are self watering pots good for orchids?
Orchids, on the other hand, haven’t fared as well in self-watering pots in my experience. They have specific watering needs, including periods of dryness between waterings, that aren’t always compatible with self-watering systems. I’ve found it’s best to stick with traditional pots and water them manually.
Are self watering pots good for peace lilies?
Peace lilies have done surprisingly well in self-watering pots. They appreciate consistent moisture, and the self-watering feature ensures they stay hydrated without the risk of overwatering. It’s made caring for my peace lilies much more foolproof.
Are self watering pots good for snake plants?
Snake plants are another indoor plant that thrives in self-watering pots. They’re quite resilient and can tolerate periods of dryness, but they also benefit from consistent moisture. Self-watering pots strike the perfect balance, providing just enough water to keep them healthy without the need for frequent watering.
Are self watering pots good for succulents?
Succulents, on the other hand, haven’t done as well in self-watering pots in my experience. They’re adapted to arid conditions and prefer well-draining soil that dries out between waterings. The constant moisture provided by self-watering pots can lead to root rot and other issues.
Are self watering pots good for tomatoes?
Tomatoes can be grown in self-watering pots with success, especially in smaller spaces or urban environments where traditional gardening may not be feasible. The self-watering feature helps ensure they get consistent moisture, which is crucial for fruit development. However, it’s important to choose a pot size that accommodates the tomato plant’s root system and to monitor soil moisture levels closely.
Are self watering pots good for venus fly traps?
Venus fly traps are highly specialized plants that require a specific growing environment, and self-watering pots may not provide the conditions they need to thrive. They prefer to be watered with distilled water or rainwater and require a period of dormancy during the winter months. While self-watering pots can provide moisture, they may not meet all of the plant’s unique requirements.
Do ferns like self watering pots?
Ferns can thrive in self-watering pots, but it depends on the specific needs of the fern species and the design of the self-watering pot. Some ferns, like Boston ferns, appreciate consistent moisture, making them well-suited for self-watering pots. However, it’s essential to ensure that the pot provides adequate drainage and doesn’t keep the soil too waterlogged, as ferns can be prone to root rot if they’re sitting in soggy conditions for too long. Overall, self-watering pots can be a convenient option for growing ferns, but it’s crucial to monitor the soil moisture and adjust watering as needed to prevent any issues.
Do self watering pots attract mosquitoes?
Absolutely! Those self-watering pots can be a breeding ground for mosquitoes if you’re not careful. Stagnant water is basically a mosquito maternity ward, and the reservoir in a self-watering pot can be a perfect place for them to lay eggs.
I’ve definitely noticed a few pesky mosquitos buzzing around my self-watering planters before. It’s not pleasant, and it kind of defeats the purpose of having these low-maintenance pots!
The good news is there are ways to outsmart the mosquitoes. First, I try to avoid overfilling the reservoir. The less water sitting around, the less attractive it is for them to lay eggs. Second, I keep an eye on the water level and change it out regularly, especially in hot weather when mosquito populations tend to boom. Some people even recommend adding a few drops of vegetable oil to the water – apparently it disrupts the surface tension and makes it harder for them to lay eggs. I haven’t tried that myself yet, but it might be worth a shot!
Overall, self-watering pots are great, but keeping them mosquito-free takes a little vigilance. By being mindful of the water level and using a few preventative tricks, you can keep your plants hydrated and your patio bite-free.
Do self watering spikes work?
Self-watering spikes can be a helpful tool, but they work best in certain situations. Here’s my take on them:
For short trips, like a long weekend away, they can be a lifesaver for low-needs plants. The spikes slowly release water into the soil as needed, keeping things from completely drying out. I’ve used them for my snake plant and it seemed happy as a clam when I returned.
However, they’re not perfect. They might not provide enough water for thirsty plants, especially in hot weather. Also, it can be tricky to gauge how much water is actually getting to the roots. Sometimes the top soil feels dry even though the reservoir in the spike is full.
Another thing to consider is pot size. The spikes work best in smaller to medium-sized pots. In a large pot, they might not reach all the roots, leaving some areas dry.
Overall, I find self-watering spikes are a decent option for short getaways and low-maintenance plants. But for long absences or finicky plants, I’d probably stick with self-watering pots or ask a friend to give them a proper watering.
How do self watering garden beds work?
Self-watering garden beds, also known as wicking beds or sub-irrigated planters, are a game-changer for anyone who struggles with keeping their veggies or flowers evenly moist. They’re basically built-in mini watering systems for your raised garden!
Here’s the magic: the bed itself has two compartments. The bottom part acts as a water reservoir, like an underground lake for your plants. The top part is filled with your usual potting mix where the plants grow. Now, the cool part is there’s a barrier in between, often made of fabric or a mesh screen. This barrier separates the water reservoir from the soil, but it allows water to wick up into the soil through capillary action. It’s like using a paper towel – the water gets sucked up from the bottom reservoir as the soil dries out higher up.
This way, the plants can access water whenever they need it, and you don’t have to worry about underwatering or overwatering. There’s usually a water level indicator on the reservoir so you know when it’s time to refill, kind of like a giant water gauge for your veggies.
I’ve found self-watering beds to be a lifesaver, especially during hot summers when I practically live with a watering can in hand. They’ve also been a huge help when I’m short on time or going on vacation. My tomatoes seem much happier now that they can regulate their own water intake!
How do self watering hanging baskets work?
Self-watering hanging baskets are a lifesaver for keeping my favorite cascading flora thriving! They take the guesswork out of watering those high-up plants that always seem to be on the brink of dehydration. Here’s how they work their magic:
Imagine a double-decker planter. The top part, where you plant your beauties, is like any regular hanging basket. But the bottom half holds the secret weapon – a water reservoir. This built-in water tank keeps a hidden stash ready for your plants whenever they get thirsty.
The coolest part is the connection between the two sections. There’s usually a fabric wick or a series of porous channels that act as a water bridge. These wicks dip down into the reservoir and reach up into the potting mix. As the soil dries out, water gets sucked up through the wicks by capillary action, just like a straw pulling up a drink. This way, the plants can access water directly from the reservoir below, without needing you to constantly be climbing up a ladder with a watering can.
Many self-watering hanging baskets even have a water level indicator on the outside. It’s like a little window you can peek through to see if the reservoir needs a top-up. No more guessing games about how parched your plants are!
Overall, self-watering hanging baskets have been a game-changer for my balcony garden. They keep my petunias overflowing with blooms and my ferns lush and happy, even on those scorching summer days. Plus, they’ve given me peace of mind knowing my hanging beauties won’t dry out if I forget to water them for a day or two.
How do you fertilize self watering containers?
There are a couple of ways I’ve tackled fertilizing my self-watering containers, and the best method depends on the type of fertilizer and the container itself.
For starters, I tend to shy away from super strong fertilizers for self-watering pots. Since the fertilizer sits in the reservoir and gets released slowly, there’s a higher risk of burning the plant’s roots if you use too much. So, I usually dilute liquid fertilizer more than the package instructions recommend.
Here are the two main approaches I use:
- Direct Reservoir Feeding: If I’m using a liquid fertilizer, I’ll mix a diluted solution directly in the reservoir itself. The trick here is to only fill the reservoir to about ¾ capacity. That way, the plant roots aren’t constantly sitting in fertilized water, which can be harsh. Then, I monitor the water level and refill with plain water once it gets low. This ensures the plants get a little nutrient boost but also have access to plain water for dilution.
- Slow Release Boost: Another option I like is using slow-release fertilizer pellets. These are little nuggets packed with nutrients that dissolve gradually over time. I’ll sprinkle a small amount of these pellets on top of the soil in the pot. As the plant waters itself, the water slowly dissolves the pellets, releasing nutrients into the soil for the roots to absorb. This is a hands-off approach that provides sustained feeding without the risk of overdoing it.
No matter which method I choose, I always keep an eye on my plants for any signs of fertilizer burn, like yellowing leaves or stunted growth. If that happens, I know to flush out the reservoir with plain water and maybe ease off on the feeding for a while.
By being mindful of dilution and choosing the right application method, you can keep your plants in self-watering containers happy and thriving!
How to make a self watering moss pole?
Absolutely! Making a self-watering moss pole is a fun way to give your climbing plants a happy and hydrated home. Here’s how I’ve done it in the past:
Materials:
- PVC pipe (diameter depends on your plant)
- Sphagnum moss (dried)
- Mesh or gutter guard
- Rope (cotton or macrame cord works well)
- Cable ties
- Pot with drainage holes (size for your plant)
- Optional: Cap for the PVC pipe
Steps:
- Prep the Pipe: If you’re using a cap, attach it to one end of the PVC pipe. This will create a closed bottom for the water reservoir.
- Soak the Moss: Fill a container with warm water and completely submerge the sphagnum moss. Let it soak for at least 20 minutes, until the moss is fully hydrated and expands. Squeeze out any excess water so it’s damp but not dripping.
- Wrap the Pipe: Here comes the fun part! Cut a length of mesh or gutter guard to match the height of your PVC pipe. Wrap the mesh around the pipe and secure it with cable ties at the top and bottom. This will create a little pocket to hold the moss against the pipe.
- Moss Time: Carefully stuff the damp moss into the mesh pocket around the PVC pipe. Use a chopstick or spoon to nudge the moss into any corners and make sure there are no gaps. You want the moss to be packed snugly but not compressed.
- Create the Wick: Cut a length of rope a few feet longer than the height of your moss pole. One end will dangle in the water reservoir, the other will be used to secure the pole to the pot. Thread the rope down through the center of the moss-filled pipe. You can tie a small knot at the bottom end to help keep it in place.
- Secure the Rope: Pull the rope up from the bottom of the pipe until some slack remains. Wrap the remaining rope around the PVC pipe and moss pole, securing it with cable ties every few inches. This will create a stable structure and hold the moss in place.
- Potting Up: Fill your pot with well-draining potting mix. Plant your climbing plant in the pot, positioning it near the moss pole. Carefully secure the stem of your plant to the moss pole using garden ties or velcro plant ties.
- Water Reservoir: Carefully stand the moss pole upright in the pot, making sure the rope reaches the bottom. Fill the PVC pipe reservoir with water until the water level reaches just below the base of the mesh. The moss will wick up the water as needed.
Tips:
- You can add a water level indicator to your pole. Cut a thin strip of clear plastic and tape it to the outside of the PVC pipe. This will let you see how much water is left in the reservoir.
- Keep an eye on the moisture level of the moss pole. The moss should feel damp but not soggy. If it feels dry, add more water to the reservoir.
- Every few months, you might need to flush the reservoir with plain water to prevent any mineral build-up.
With a little effort, you can create a self-watering moss pole that keeps your climbing plant happy and thriving!
How to make a self watering terrarium?
Creating a self-watering terrarium is a beautiful way to bring a touch of nature indoors with minimal maintenance. Here’s how I’ve made mine in the past:
Materials:
- Clear glass container with a lid (fishbowl, jar, etc.)
- Pebbles or gravel for drainage
- Activated charcoal (optional)
- Terrarium potting mix (or a mix of potting soil, sphagnum moss, and perlite)
- Plants suitable for terrariums (ferns, mosses, bromeliads, etc.)
- Decorative elements (optional: rocks, driftwood, etc.)
- Spray bottle
Steps:
- Clean the Container: Wash your chosen container thoroughly with soap and water to remove any dust or residue. Rinse well and dry completely.
- Drainage Layer: Create a drainage layer at the bottom of the terrarium. Add a 1-2 inch layer of pebbles or gravel. This allows excess water to drain away from the plant roots and prevents them from rotting.
- Optional Charcoal Layer: Some people like to add a thin layer (around half an inch) of activated charcoal on top of the gravel. This helps absorb any impurities or odors in the terrarium and keeps the environment fresh.
- Terrarium Mix: Fill the container halfway with your terrarium potting mix or your prepared soil mixture. Make sure the mix is moist but not soggy.
- Plant Selection: Choose a variety of terrarium-friendly plants that thrive in similar humidity and light conditions. Ferns, mosses, bromeliads, and small peperomias are all popular choices. Arrange the plants in your terrarium, considering their mature size and ensuring they have enough space to grow.
- Planting Time: Carefully dig a small hole in the soil mix and place the plant’s roots in it. Gently fill the hole with soil, firming it around the base of the plant.
- Decorate (Optional): Add a touch of personality by incorporating decorative elements like small rocks, pieces of driftwood, or even colorful gravel.
- Watering: Since it’s a self-watering terrarium, resist the urge to overwater! Instead, give the terrarium a good misting with a spray bottle until the water droplets condense on the sides. This creates a mini water cycle within the terrarium, keeping the plants hydrated.
- Lid Magic: Close the lid of your terrarium. The condensation on the sides will provide moisture for your plants. The key here is to find a balance. If the terrarium gets too foggy, open the lid for a short period to allow some air circulation and prevent mold growth.
Tips:
- Choose the right container. A closed terrarium with a lid works best for creating a self-watering environment.
- Don’t overwater! Overwatering is the leading cause of failure in terrariums. Remember, the terrarium recycles its own moisture.
- Select plants with similar needs. Choose plants that thrive in similar light and humidity levels to avoid creating an imbalanced environment.
- Monitor your terrarium. Keep an eye on the moisture levels and adjust misting as needed. Open the lid occasionally for some fresh air exchange.
With a little planning and these steps, you can create a beautiful self-watering terrarium that thrives for years to come!
How to make self watering seed tray?
Making a self-watering seed tray is a fantastic way to give your seedlings a gentle start and save yourself some time on watering. Here’s how I’ve done it in the past:
Materials:
- Shallow tray or container (water reservoir)
- Seed tray with drainage holes
- Capillary mat (felt or fabric plant watering mat)
- Potting mix for seedlings
- Seeds
Steps:
- Choose Your Trays: Pick a shallow tray or container that will act as your water reservoir. It should be slightly larger than your seed tray, allowing space for the capillary mat and some air circulation. The seed tray itself needs to have good drainage holes to prevent waterlogging.
- Size Up the Mat: Cut your capillary mat to a size slightly larger than the seed tray. The mat should fit snugly inside the reservoir tray but not block the entire bottom. You want some space for air to circulate around the edges.
- Wet the Mat: Fill a sink or basin with clean water. Submerge the capillary mat for a few minutes, allowing it to soak up the water completely. Squeeze out any excess water so it’s damp but not dripping.
- Reservoir Ready: Place the damp capillary mat flat inside the larger reservoir tray.
- Fill the Seed Tray: Fill your seed tray with your chosen seedling potting mix. Moisten the mix lightly with a spray bottle until it feels evenly damp but not soggy.
- Planting Time: Plant your seeds according to the specific seed packet instructions. Some seeds need to be pressed lightly into the soil, while others prefer to be scattered on top.
- Seed Tray on Top: Carefully place the planted seed tray on top of the damp capillary mat in the reservoir tray.
- Waterproofing (Optional): For extra moisture retention, you can cover the seed tray with a clear plastic dome or humidity tray. This helps trap moisture around the seedlings and creates a mini greenhouse environment. Just remember to crack open the lid or remove it slightly every few days for some air circulation and prevent mold growth.
Watering: The beauty of this system is that the watering becomes quite hands-off. As the seedling mix dries out in the seed tray, it draws moisture up from the damp capillary mat below. Keep an eye on the water level in the reservoir tray. If it looks dry, top it up with water so the mat can continue to wick moisture to the seedlings.
Tips:
- Seedling heat mats can be helpful for some seeds that prefer warm soil temperatures for germination. Place the heat mat under the reservoir tray, not directly under the seed tray. The capillary mat will help distribute the heat evenly.
- Don’t overwater! The self-watering system provides consistent moisture, so avoid adding extra water directly to the seed tray.
- Light is crucial for seedling growth. Place your seed tray in a bright location, ideally near a sunny window, or consider using grow lights.
- Once your seedlings sprout and grow stronger, they’ll eventually need to be transplanted into larger pots.
With a little effort, you can create a self-watering seed tray that keeps your precious seedlings happy and hydrated, giving them the perfect start to their life!
If i die, water my plants!
